
A week in the Garden, 5/2-5/8
I promise: soon enough this garden journal is going to be a quick list of things that happened and not so much story telling.
But since I’m starting about six months late on documenting everything, this week I’m going to catch you/the journal up to speed with some things that happened within the past couple of months that are going to continue to evolve as the season progresses.
So let’s talk about the chicken-coop-soon-to-be-greenhouse/potting shed project.

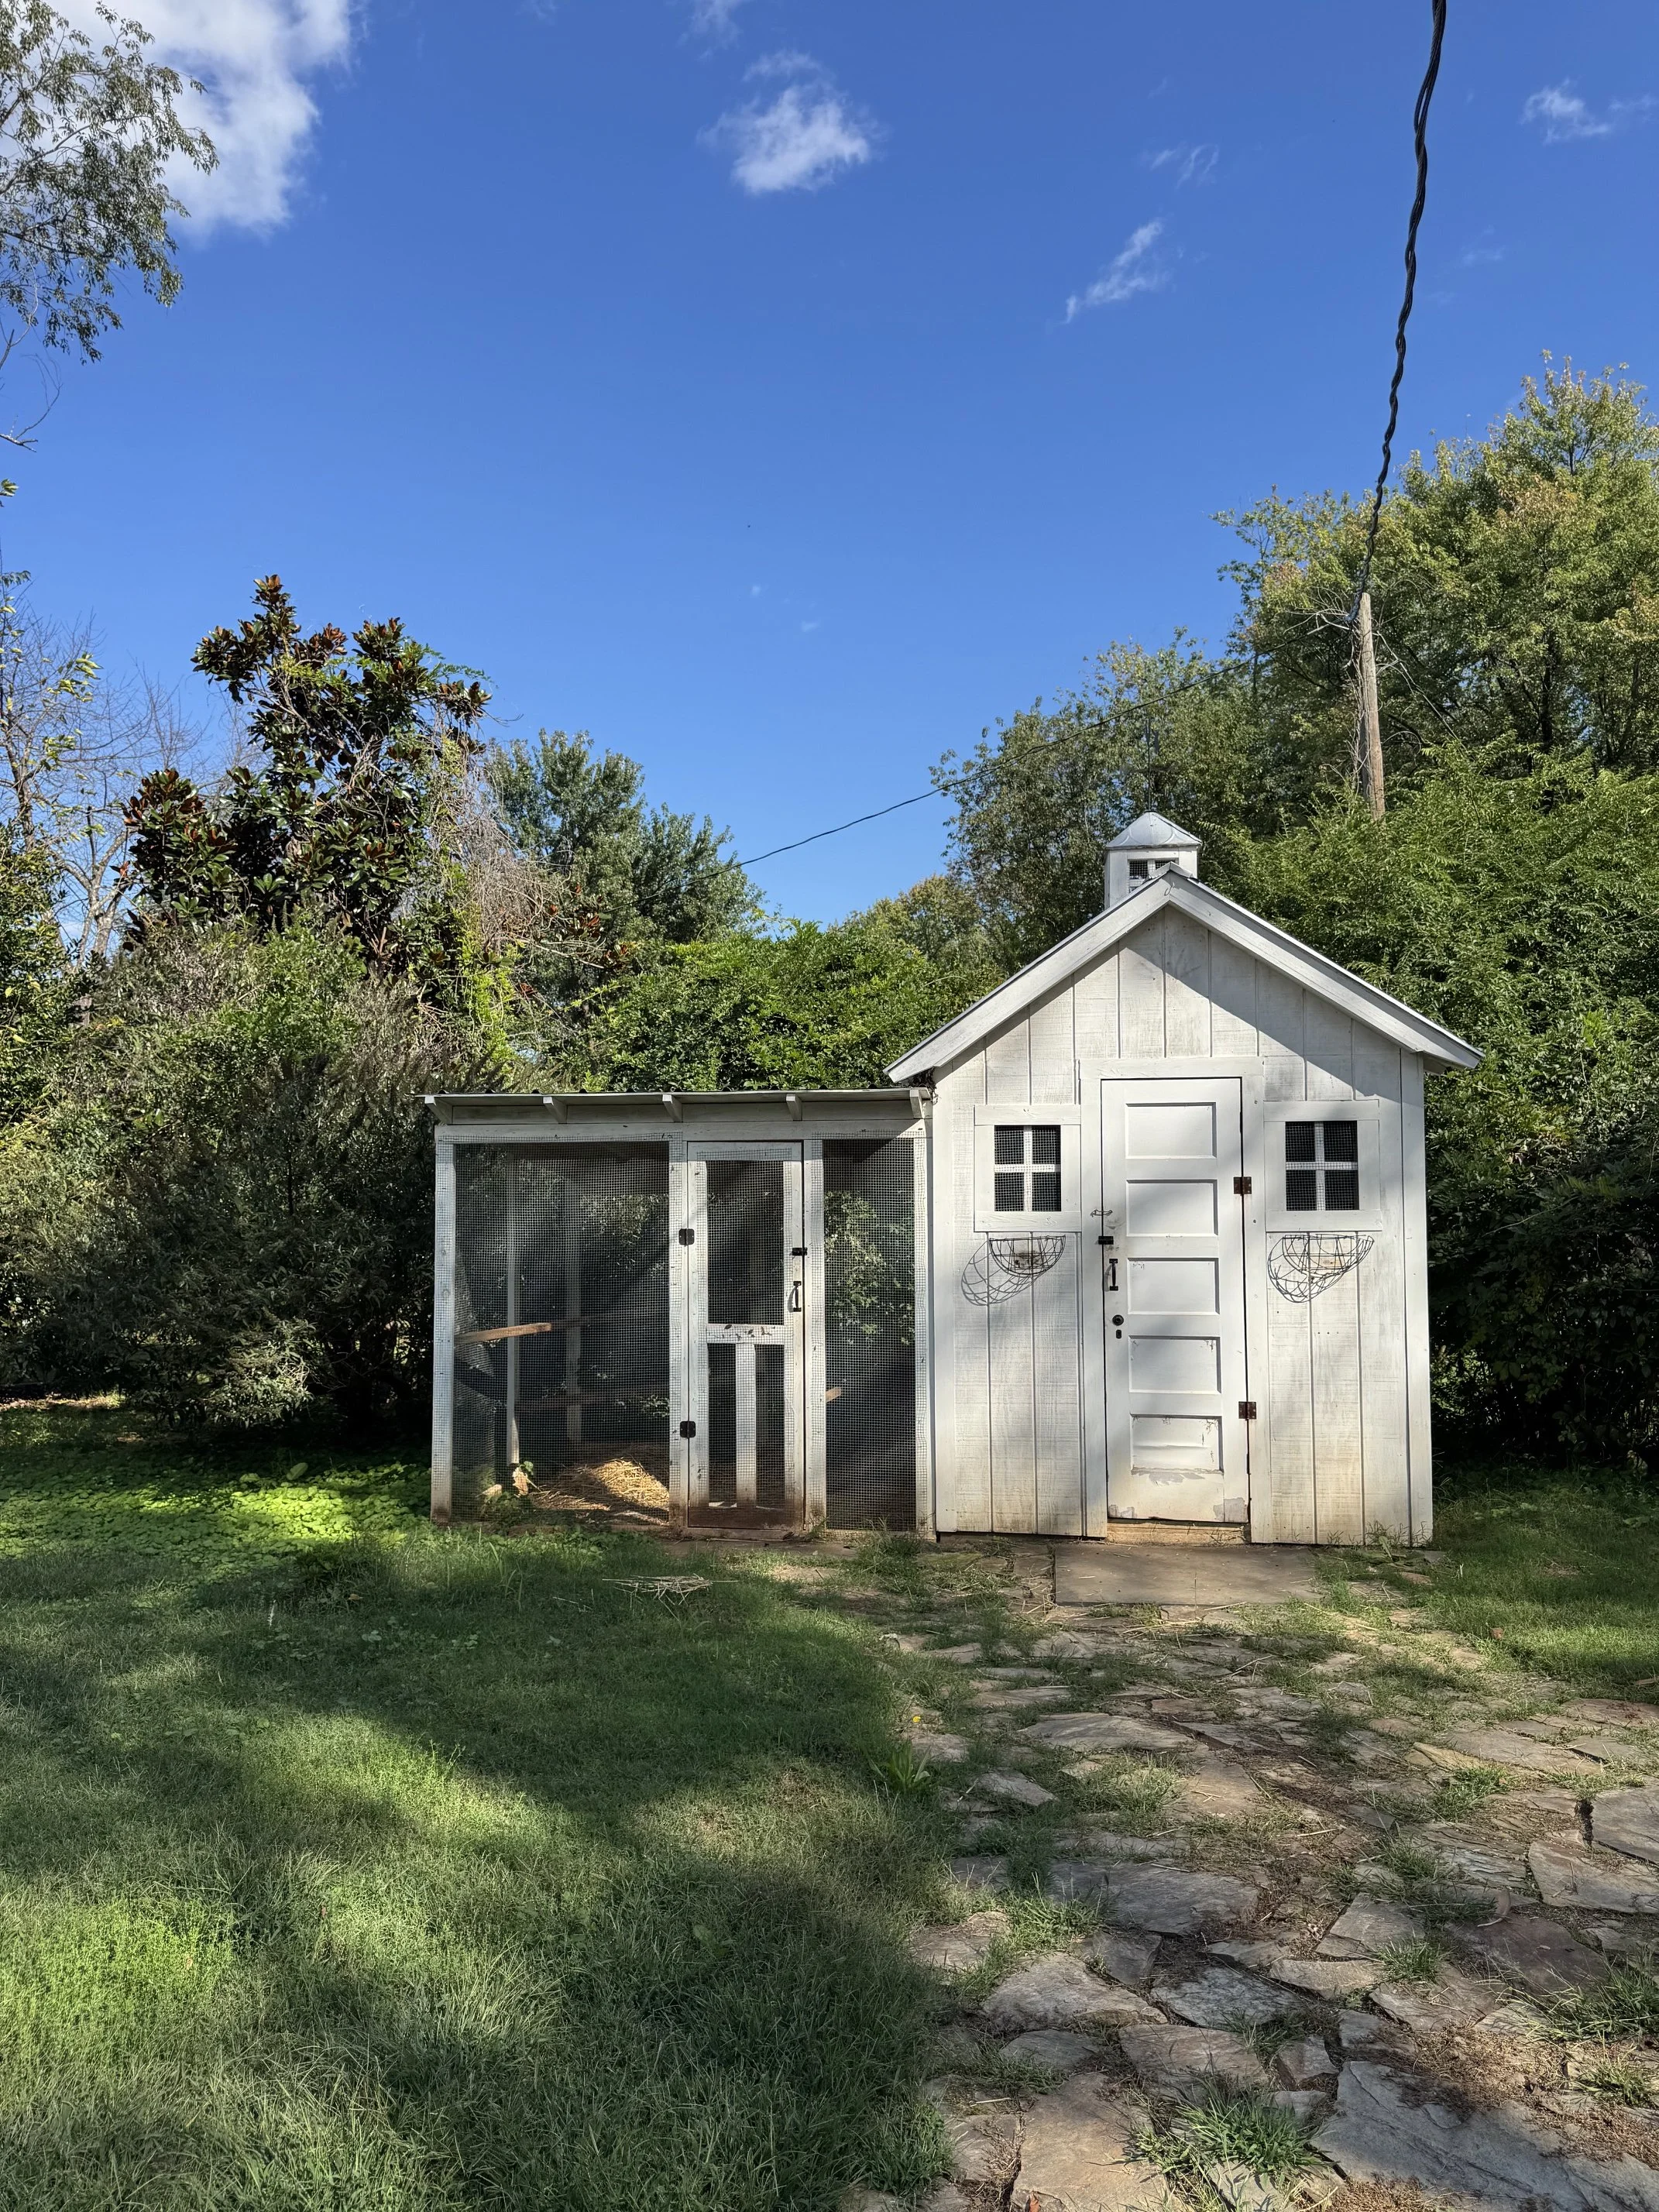
as it was
The house came with the most adorable and functional chicken coop, but having chickens isn’t something we want at the moment. Plus it’s so close to the back door and outdoor eating area, that if we ever did get them, I’d want to move it far away so the smell that’s inevitable with a cute brood can be a little further away.
So in my mind this is the perfect greenhouse/potting shed area flanked by two mini flower beds, and this winter I took the first steps of taking down the giant butterfly bush that was blocking our view into the open backyard and light into what will be the greenhouse side. Then I laid weed fabric to kill the weeds through the winter, which worked really well! After about a month, the grass/weeds were dead and the soil a breeze to dig into.
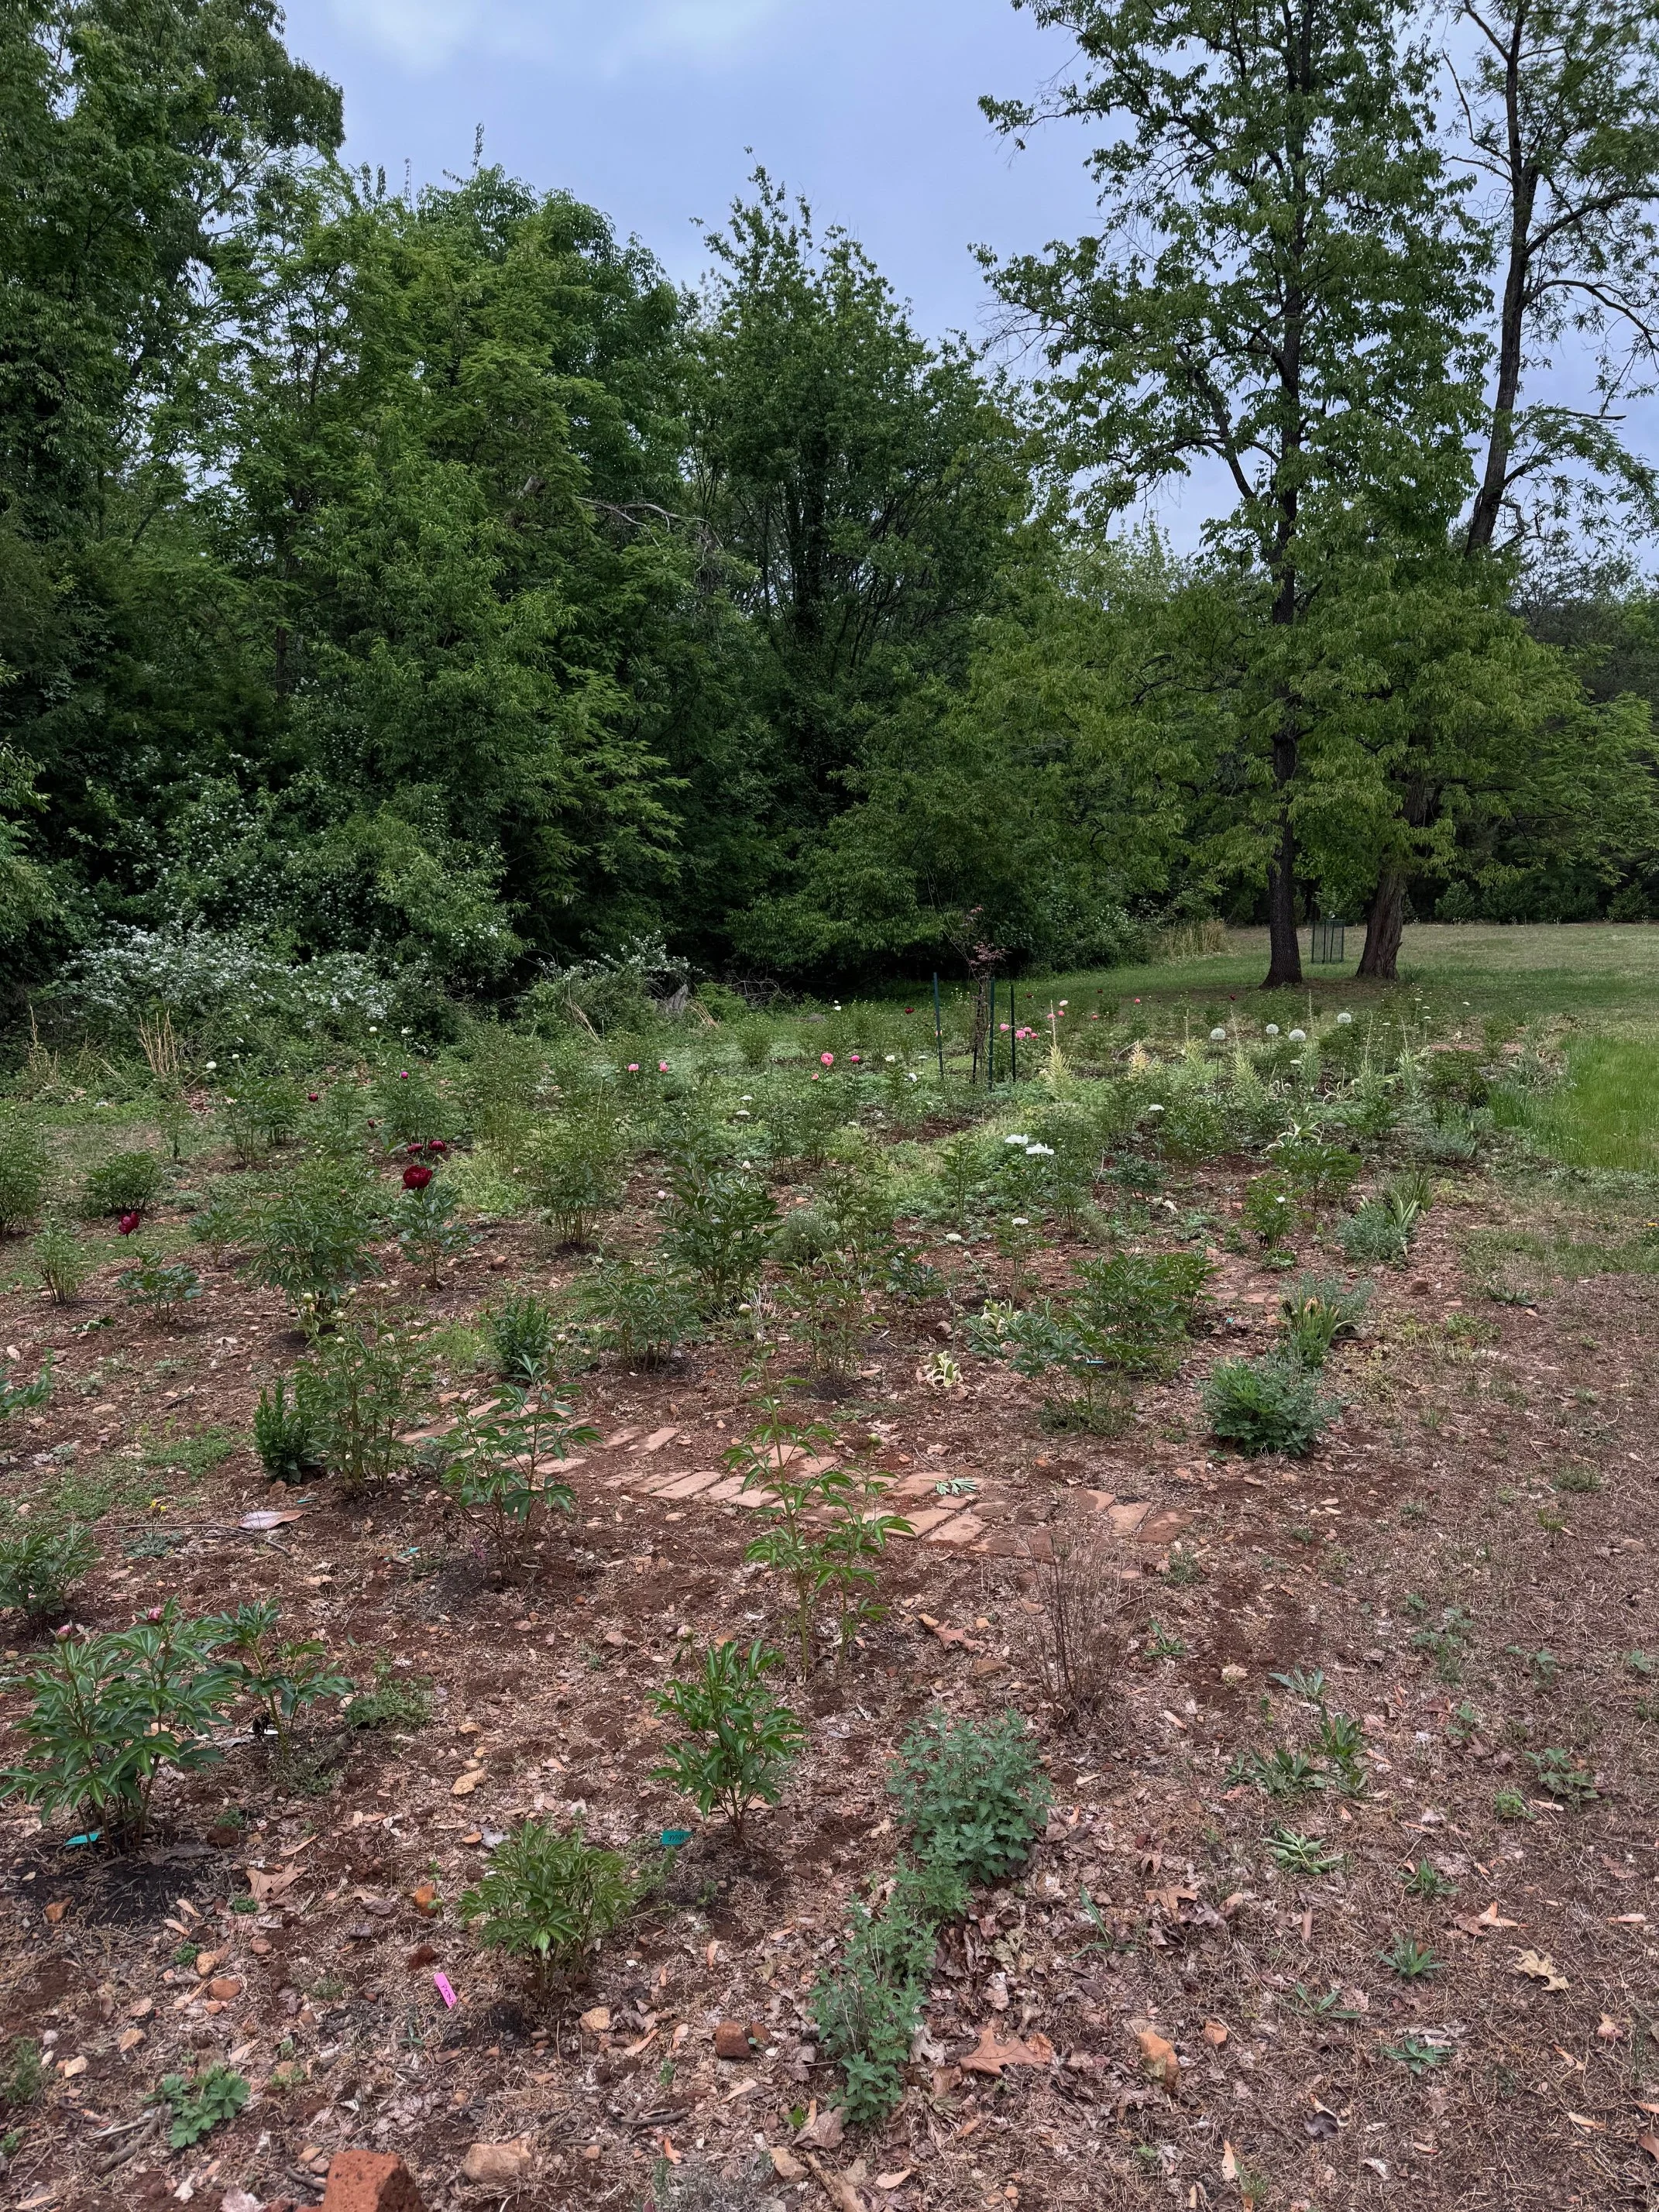
more breathing room now that the butterfly bush is gone, and a view into the backyard/soon to be wildflower meadow - wisteria shown in the trees is still being tackled on the daily
The thought was the create a perfect 10’x 10’ flower bed to the left of the building, where the butterfly bush used to be, in which I’d create a large perennial footprint but leave a few holes for annuals. Next week I’ll share the sketch of how I laid it out, as well as the plants included in the mix.
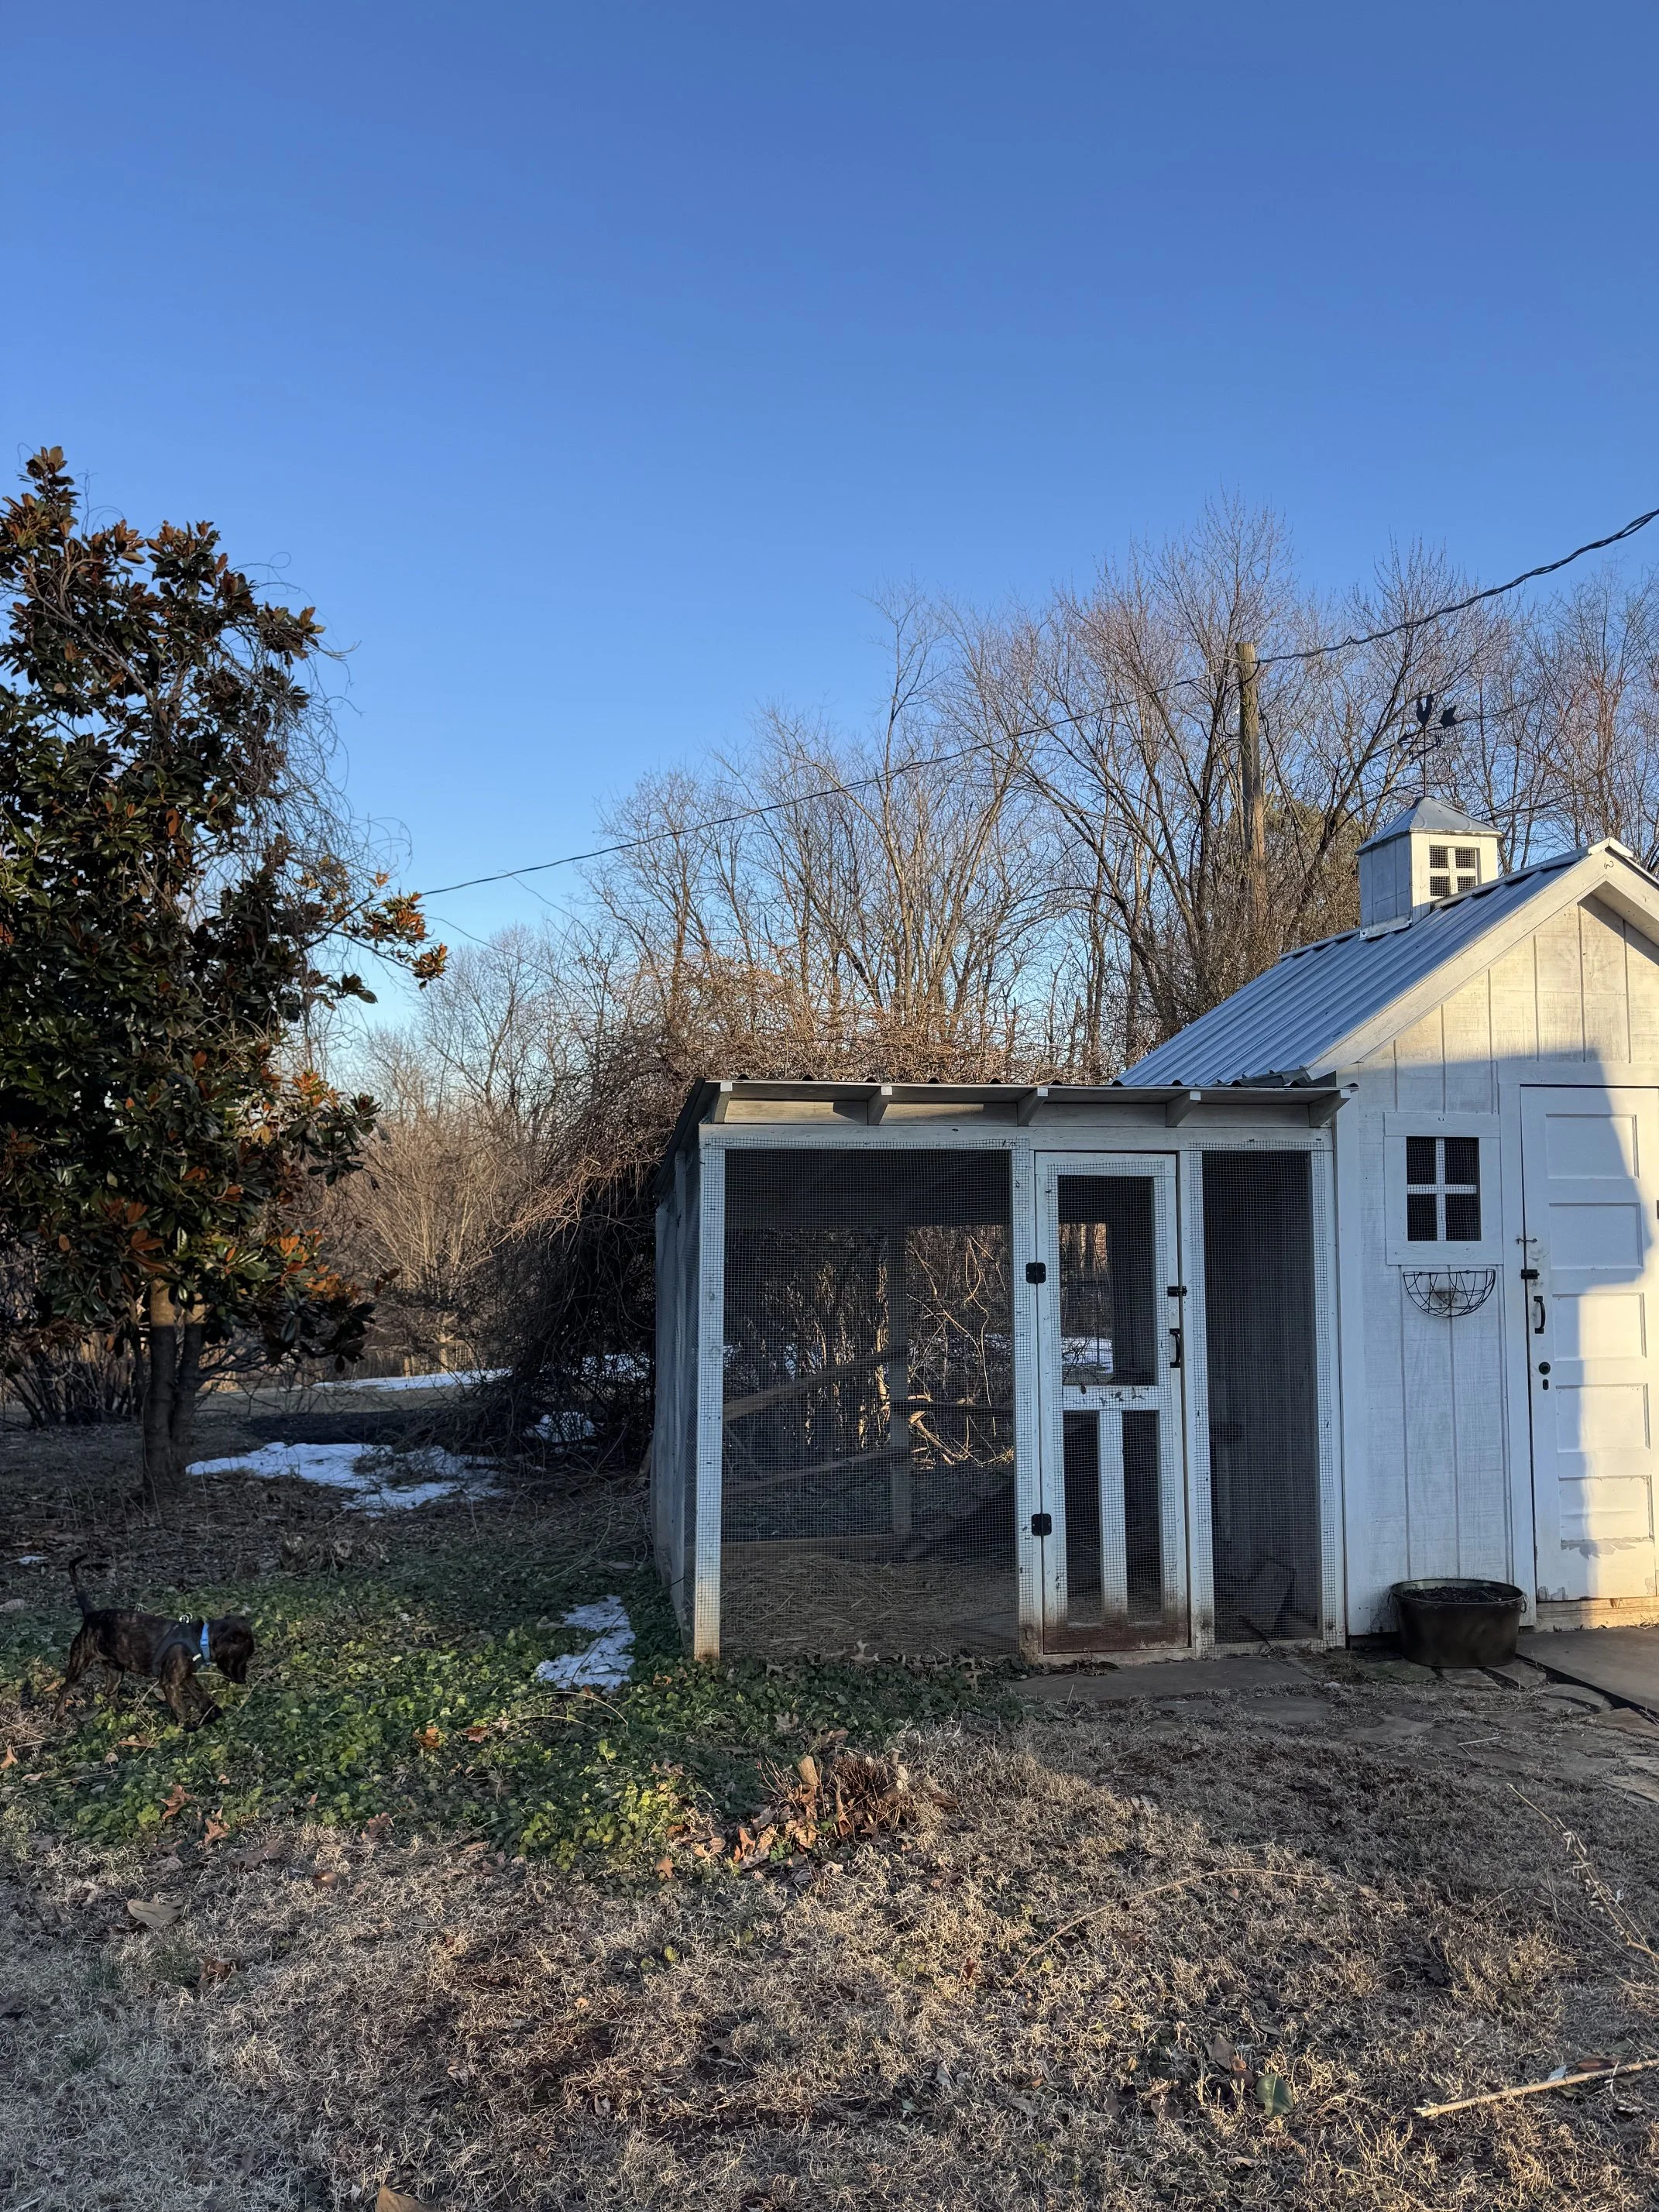
To the right of the building, last fall I quickly planted a rose bush uprooted from my old farm, which never actually bloomed because deer constantly attacked it for the four years I was there. So, it’s exciting that this is first time ever the plant has taken off…but it’s a red. Which is beautiful but I thought the rose was yellow, and the whole planting scheme from this space was purple/whites/yellows/soft greens sooooo yeah, that may have to get moved this fall.
Anyway, I expanded the bed in front of the shrub to include a few herbs and plants to mimic the left side, and then I used the headboard and footboard of my metal teenage bed to add a bit of boundary to both spaces. Those are going to be painted to match the exterior of the building soon.
current thoughts: so pretty but so not the place for this rose, but maybe the season will change my mind…
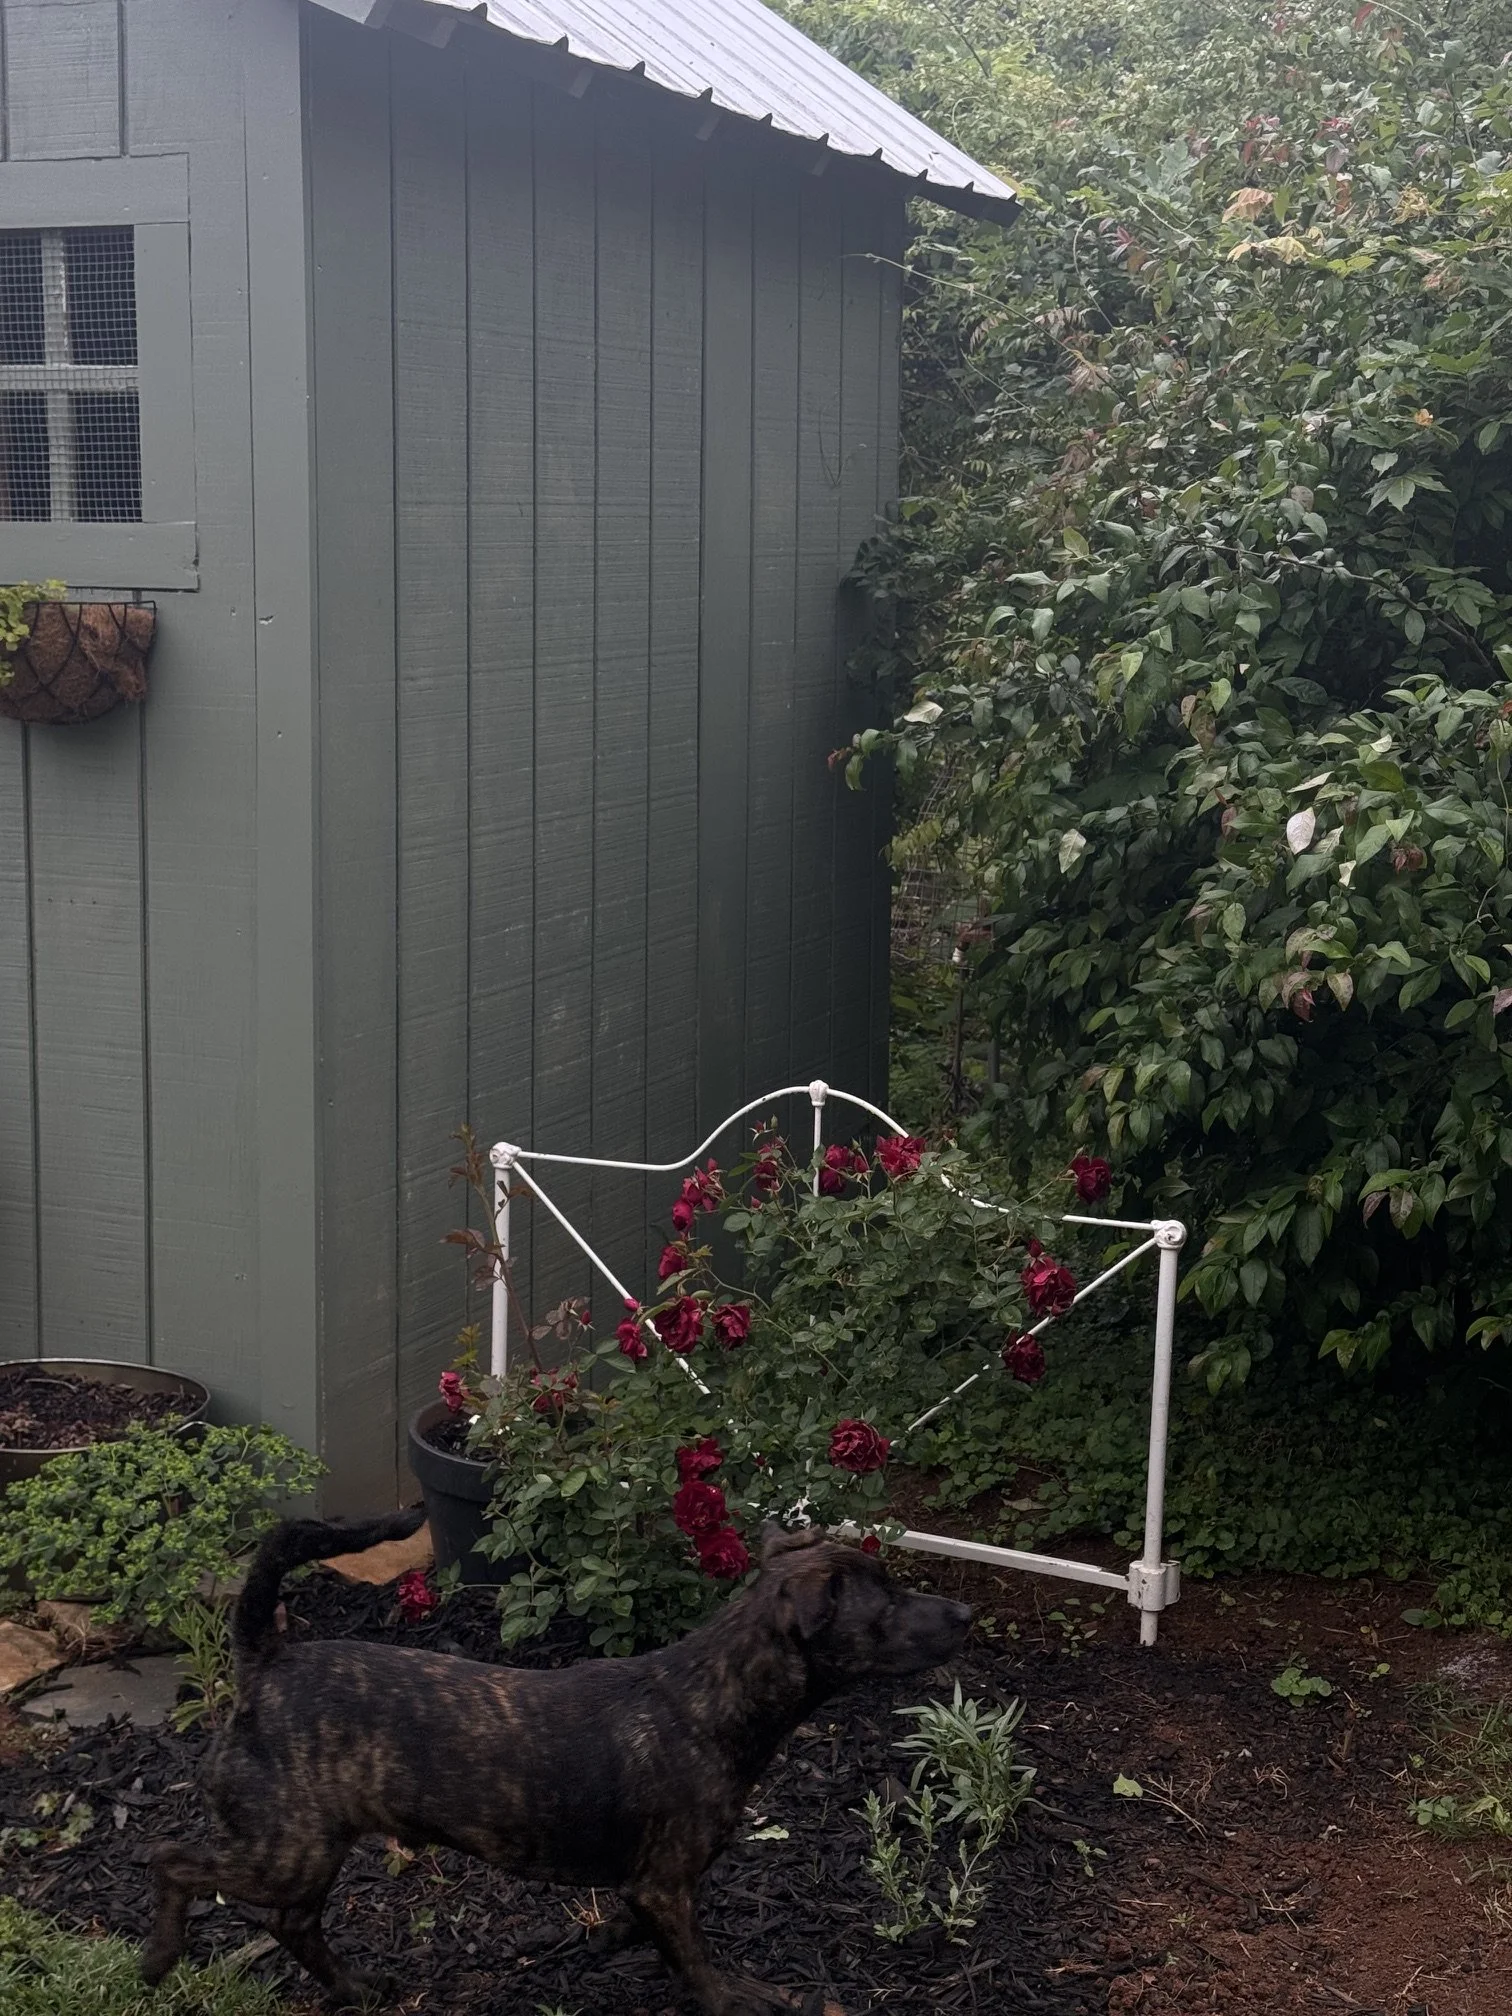
And about the paint job: the week before wedding season/client’s garden projects ramped up, I decided to paint over the white with a lovely sage green to make it blend into the background better. In hind sight, I should have waited until we removed the metal screening (to be replaced with vintage windows to create the greenhouse) because painting over that was trickier than I’d anticipated. Which meant it didn’t really get completed, so now this is how it currently looks (along with a white cupola because I completely forgot it existed until looking at it from afar and realizing it was left behind). In other words, this is a project still in the works.
Oh and a tray of 100 sedum plants arrived two weeks ago, and it took me a long while to remember that yes, I had ordered it after deciding that the greenhouse definitely needed a living roof that I’d install this spring. Winter me with a bit of wine in the system always thinks I’ll have just as much time to complete projects in the spring/summer/fall as I do in the two dark and cold months where I’m not working 16 hour days. So yeah, there’s going to be sedum living all over the place in tiny pots this season while I try my best to fit the living roof into the fall planting plan. TBD.
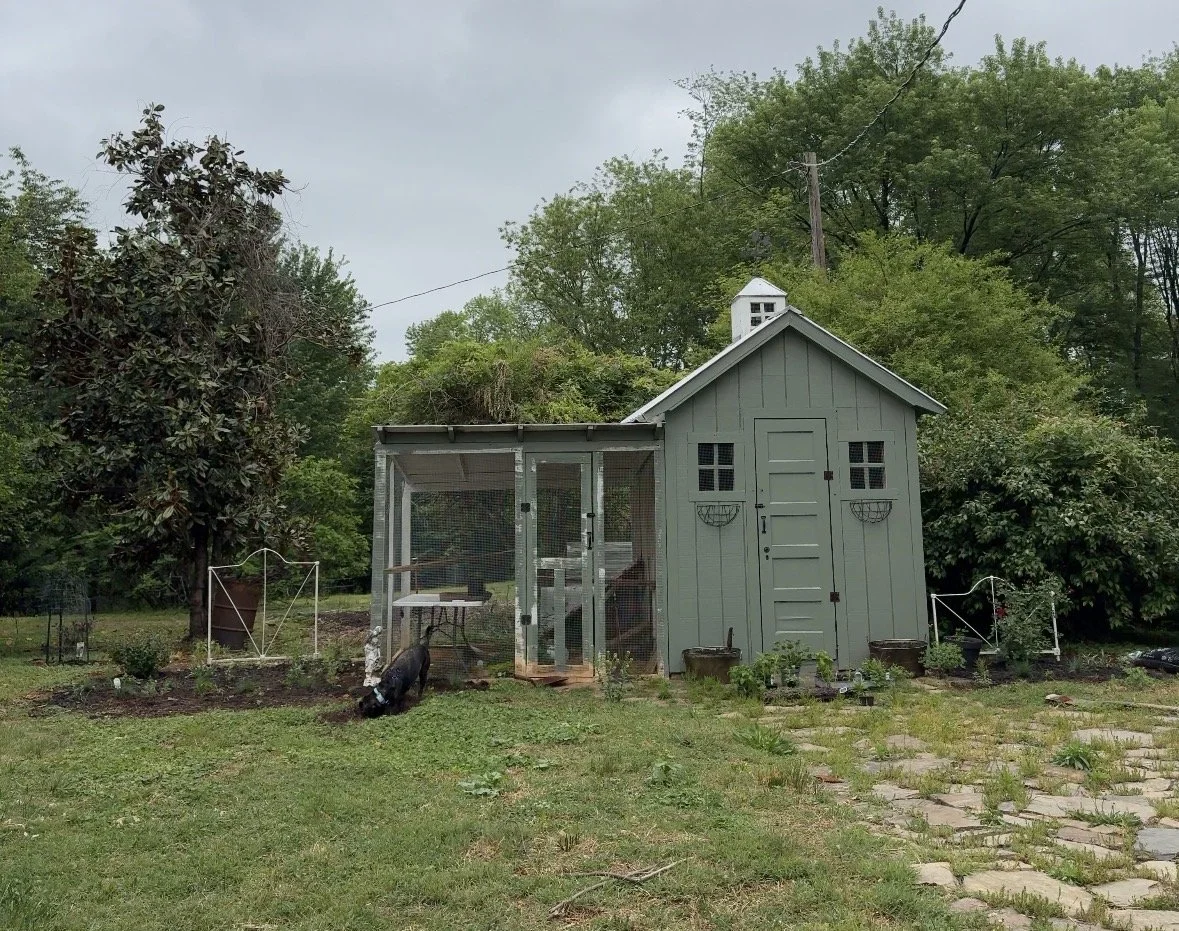
If you’re thinking “this looks worse than the before picture,” you and I are on the same page. But just showing the mess that’ll soon be cleaned up and the paint job to be completed so the full reveal looks extra good - stay tuned!
Another project I’ve been working on for a couple of months is the kitchen garden area, which was basically created to kill back the Virginia Creeper that had taken over the entire side of an out building and was starting to invade the yard. It also was an excuse to use up most of the bricks that had been left in piles around the property, but let’s just say that brick layer I am not. So filling the sad raised bed with plants and vines to cover the poor craftsmanship is priority #1. Much more on that next week!
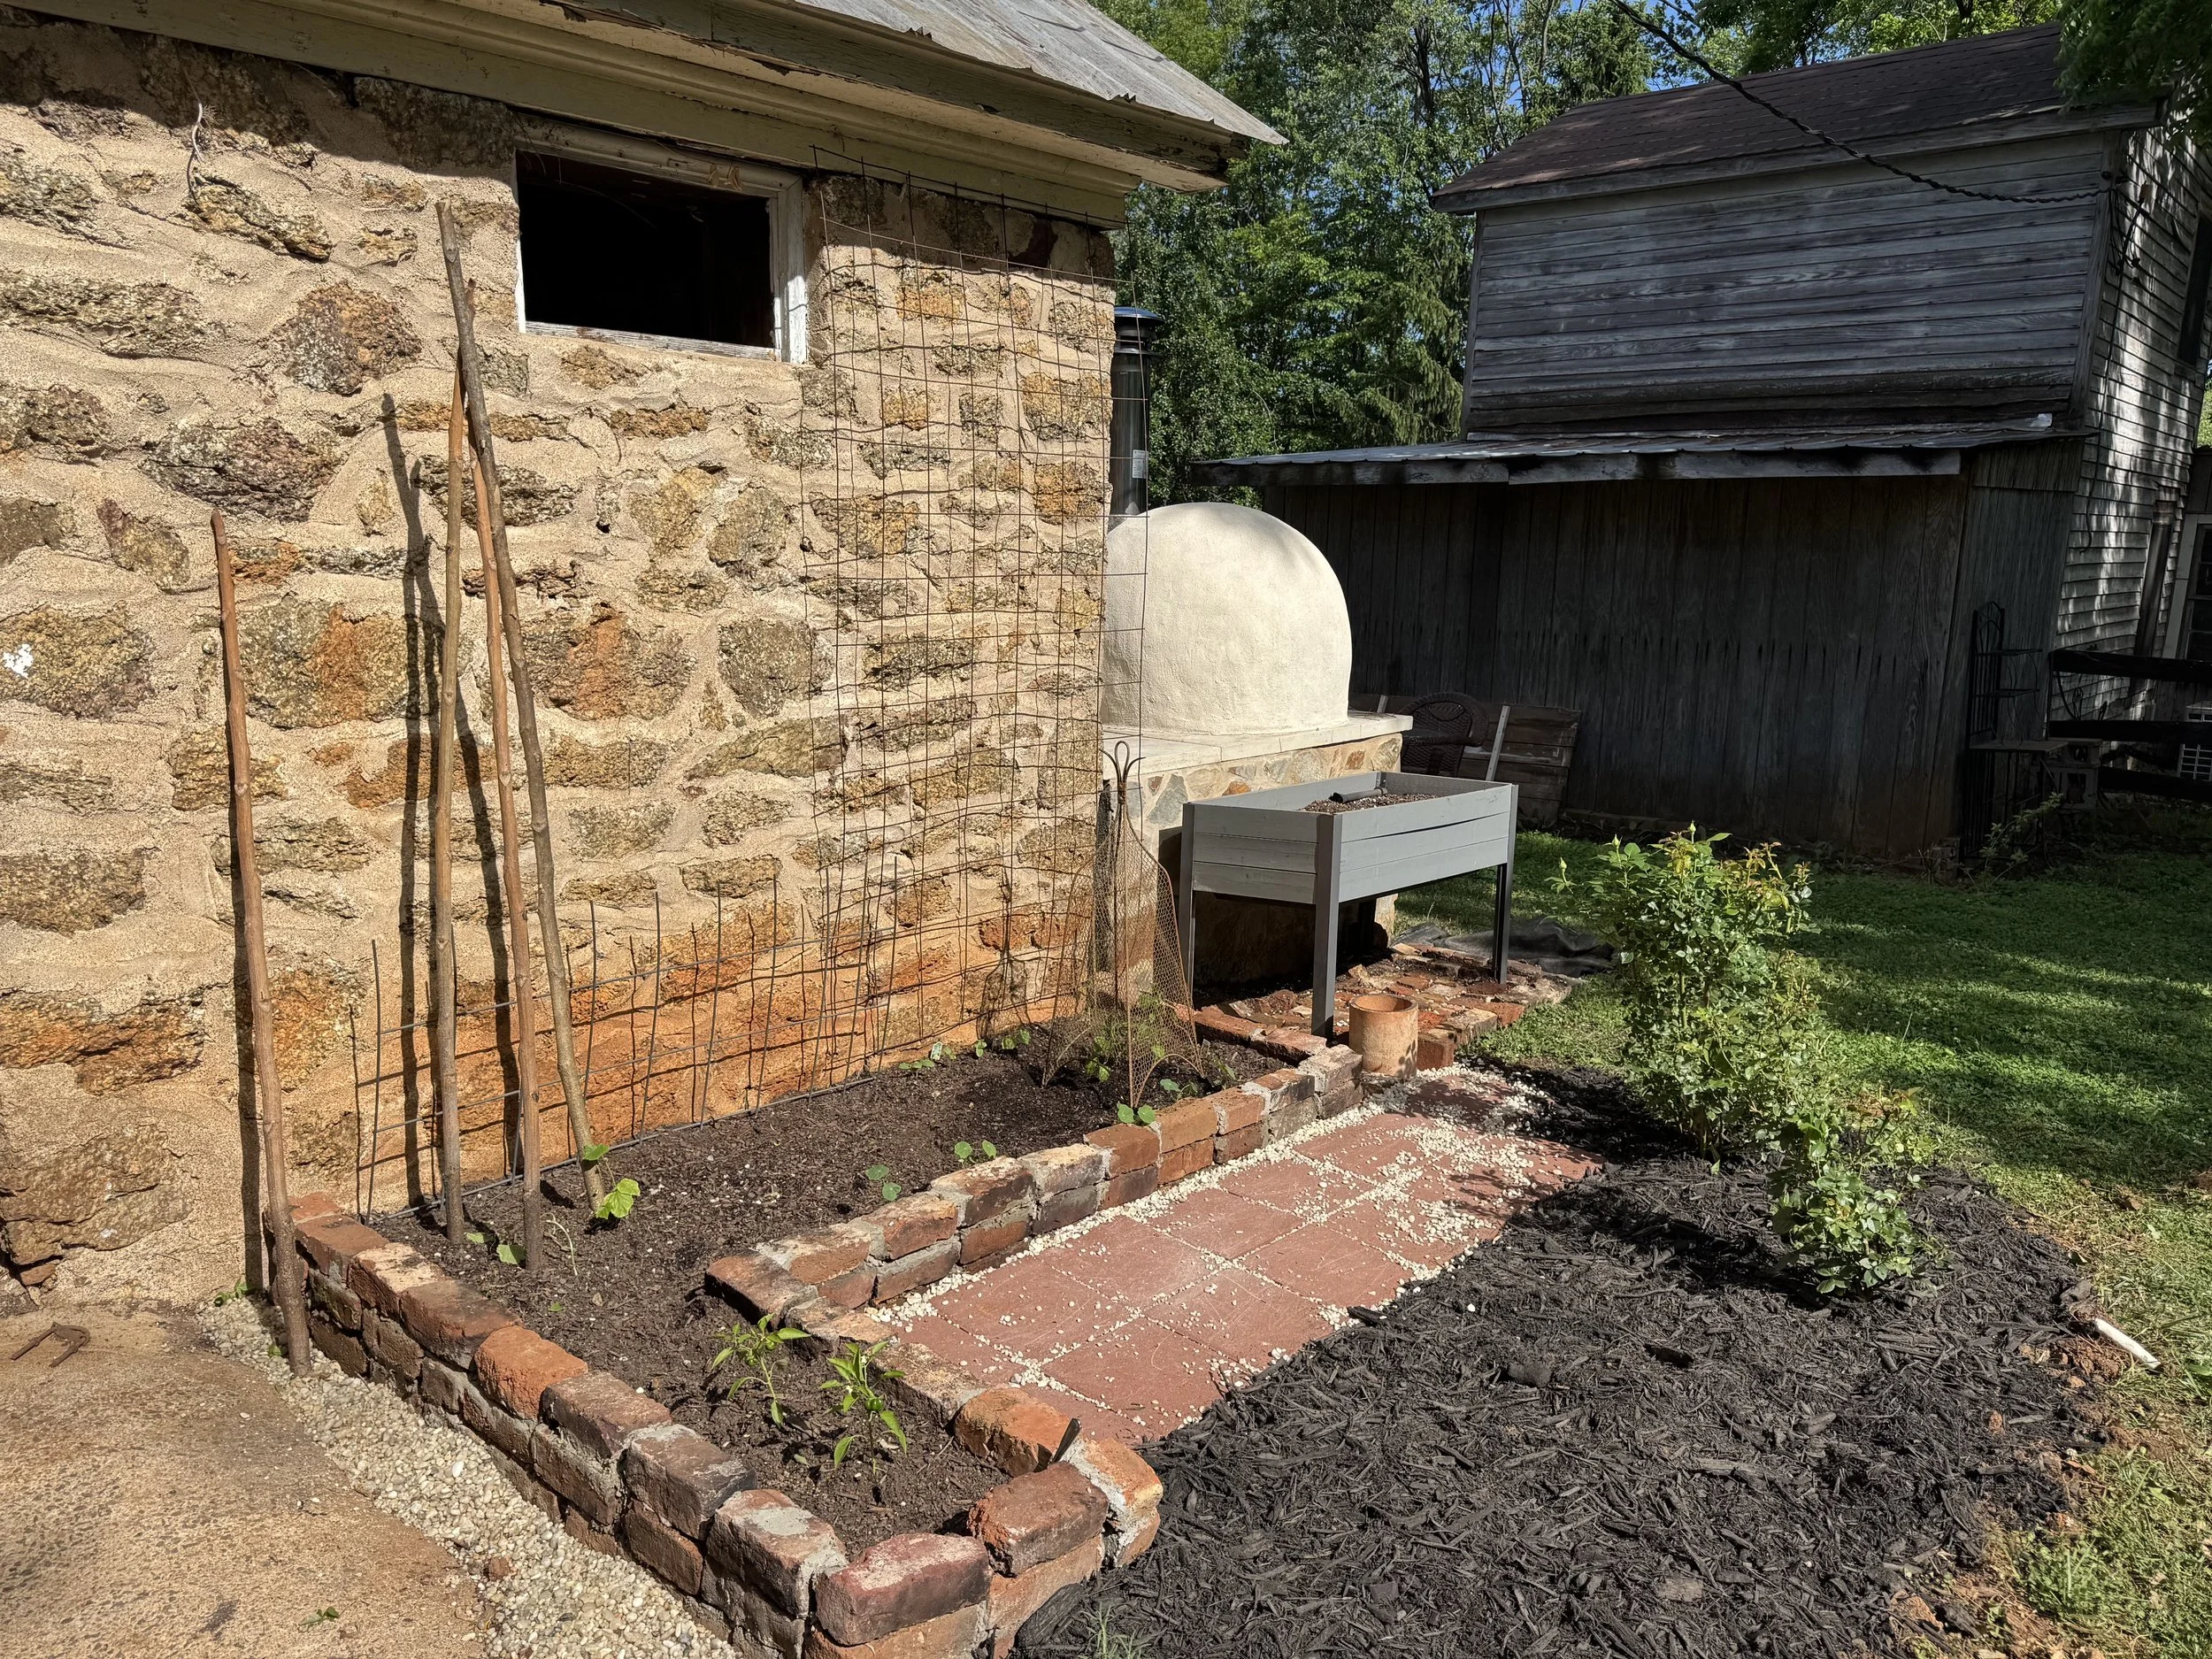
this is an after photo I can be pretty proud of in the now - will show you before pics next week, but this too will continue to evolve and hopefully become a veggie garden to enjoy
Until next week,
xxLindsey

A week in the Garden, 4/27-5/1
Before I was a gardener/florist, I was a photographer. It started as a hobby because I had toddlers who were my constant muses at home, and there was a time that I would write about them on a regular basis. Sharing photos of our time together on my website along with a few words about life at that moment.
The other day my oldest, who somehow has her driver’s license now, told me that when she’s bored at school she’ll sometimes pull up that old website and read those posts, and it makes her smile or laugh or cringe. My youngest told me she does the same and I was a little shocked, but then again googling your mom when you’re bored makes sense for their generation. Feeling grateful my digital footprint starts after college - adopting Facebook late had its perks.
Anyway, at the time I was mainly sharing those images to show others my heart and eye as a way to help people understand who I was as a photographer. And if I’m being honest, sometimes it felt like no one was reading or caring, so what was the point?
Turns out I’m now really grateful for that former self who chose to keep showing up in that way for a few years, as it’s now a time capsule of a chaotic but beautiful season of life we’ll never get back. A little walk down memory lane we can access from anywhere.
The reason I’m telling you all of this is because we just recently entered into a new chaotic season of life, having moved into our dream home and property after (sometimes impatiently) waiting for a decade for it to arrive. So now we’re balancing owning businesses while raising teenagers and a puppy and cats and growing gardens and renovating a 100+ year old house on our own.
This time around though, unlike when the girls were little and we were slightly more young and dumb, we’re now very aware of how fast time flies.
However, no matter how much we try to remember to soak it all in, these days can also feel like we’re just constantly checking off to do lists between homework and sporting events and a little bit of down time. Meaning I’ve been too tired to write it all down but going to bed worried we’re going to forget.
So today I’m taking the small step of creating a new kind of weekly practice: creating a journal, the gardening kind. The one where I bring you along to the outside of our home to mark all the changes being made as a way to share my garden knowledge/successes/failures/lessons all while making sure one day we can look back on this time and remember how far we’ve come.
It also seems appropriate that at the moment our 7 month old puppy is tugging at my legs begging to play as I write, not so different than all those years ago with two little girls always underfoot. I most likely won’t be sharing photos of the girls anymore because I can remember being a teenager and would have really hated my mom sharing too much about me online. But Duke will most likely be there because he’s the new garden sidekick.

(current 6 a.m. view as I write this)
So here goes, what may be the journey of a slightly boring list-like blog but a time capsule in the making.
This week in the gardens, Week 1, April 27-May 1:
It rained! After what feels like forever we got proper water and things are looking so much happier.
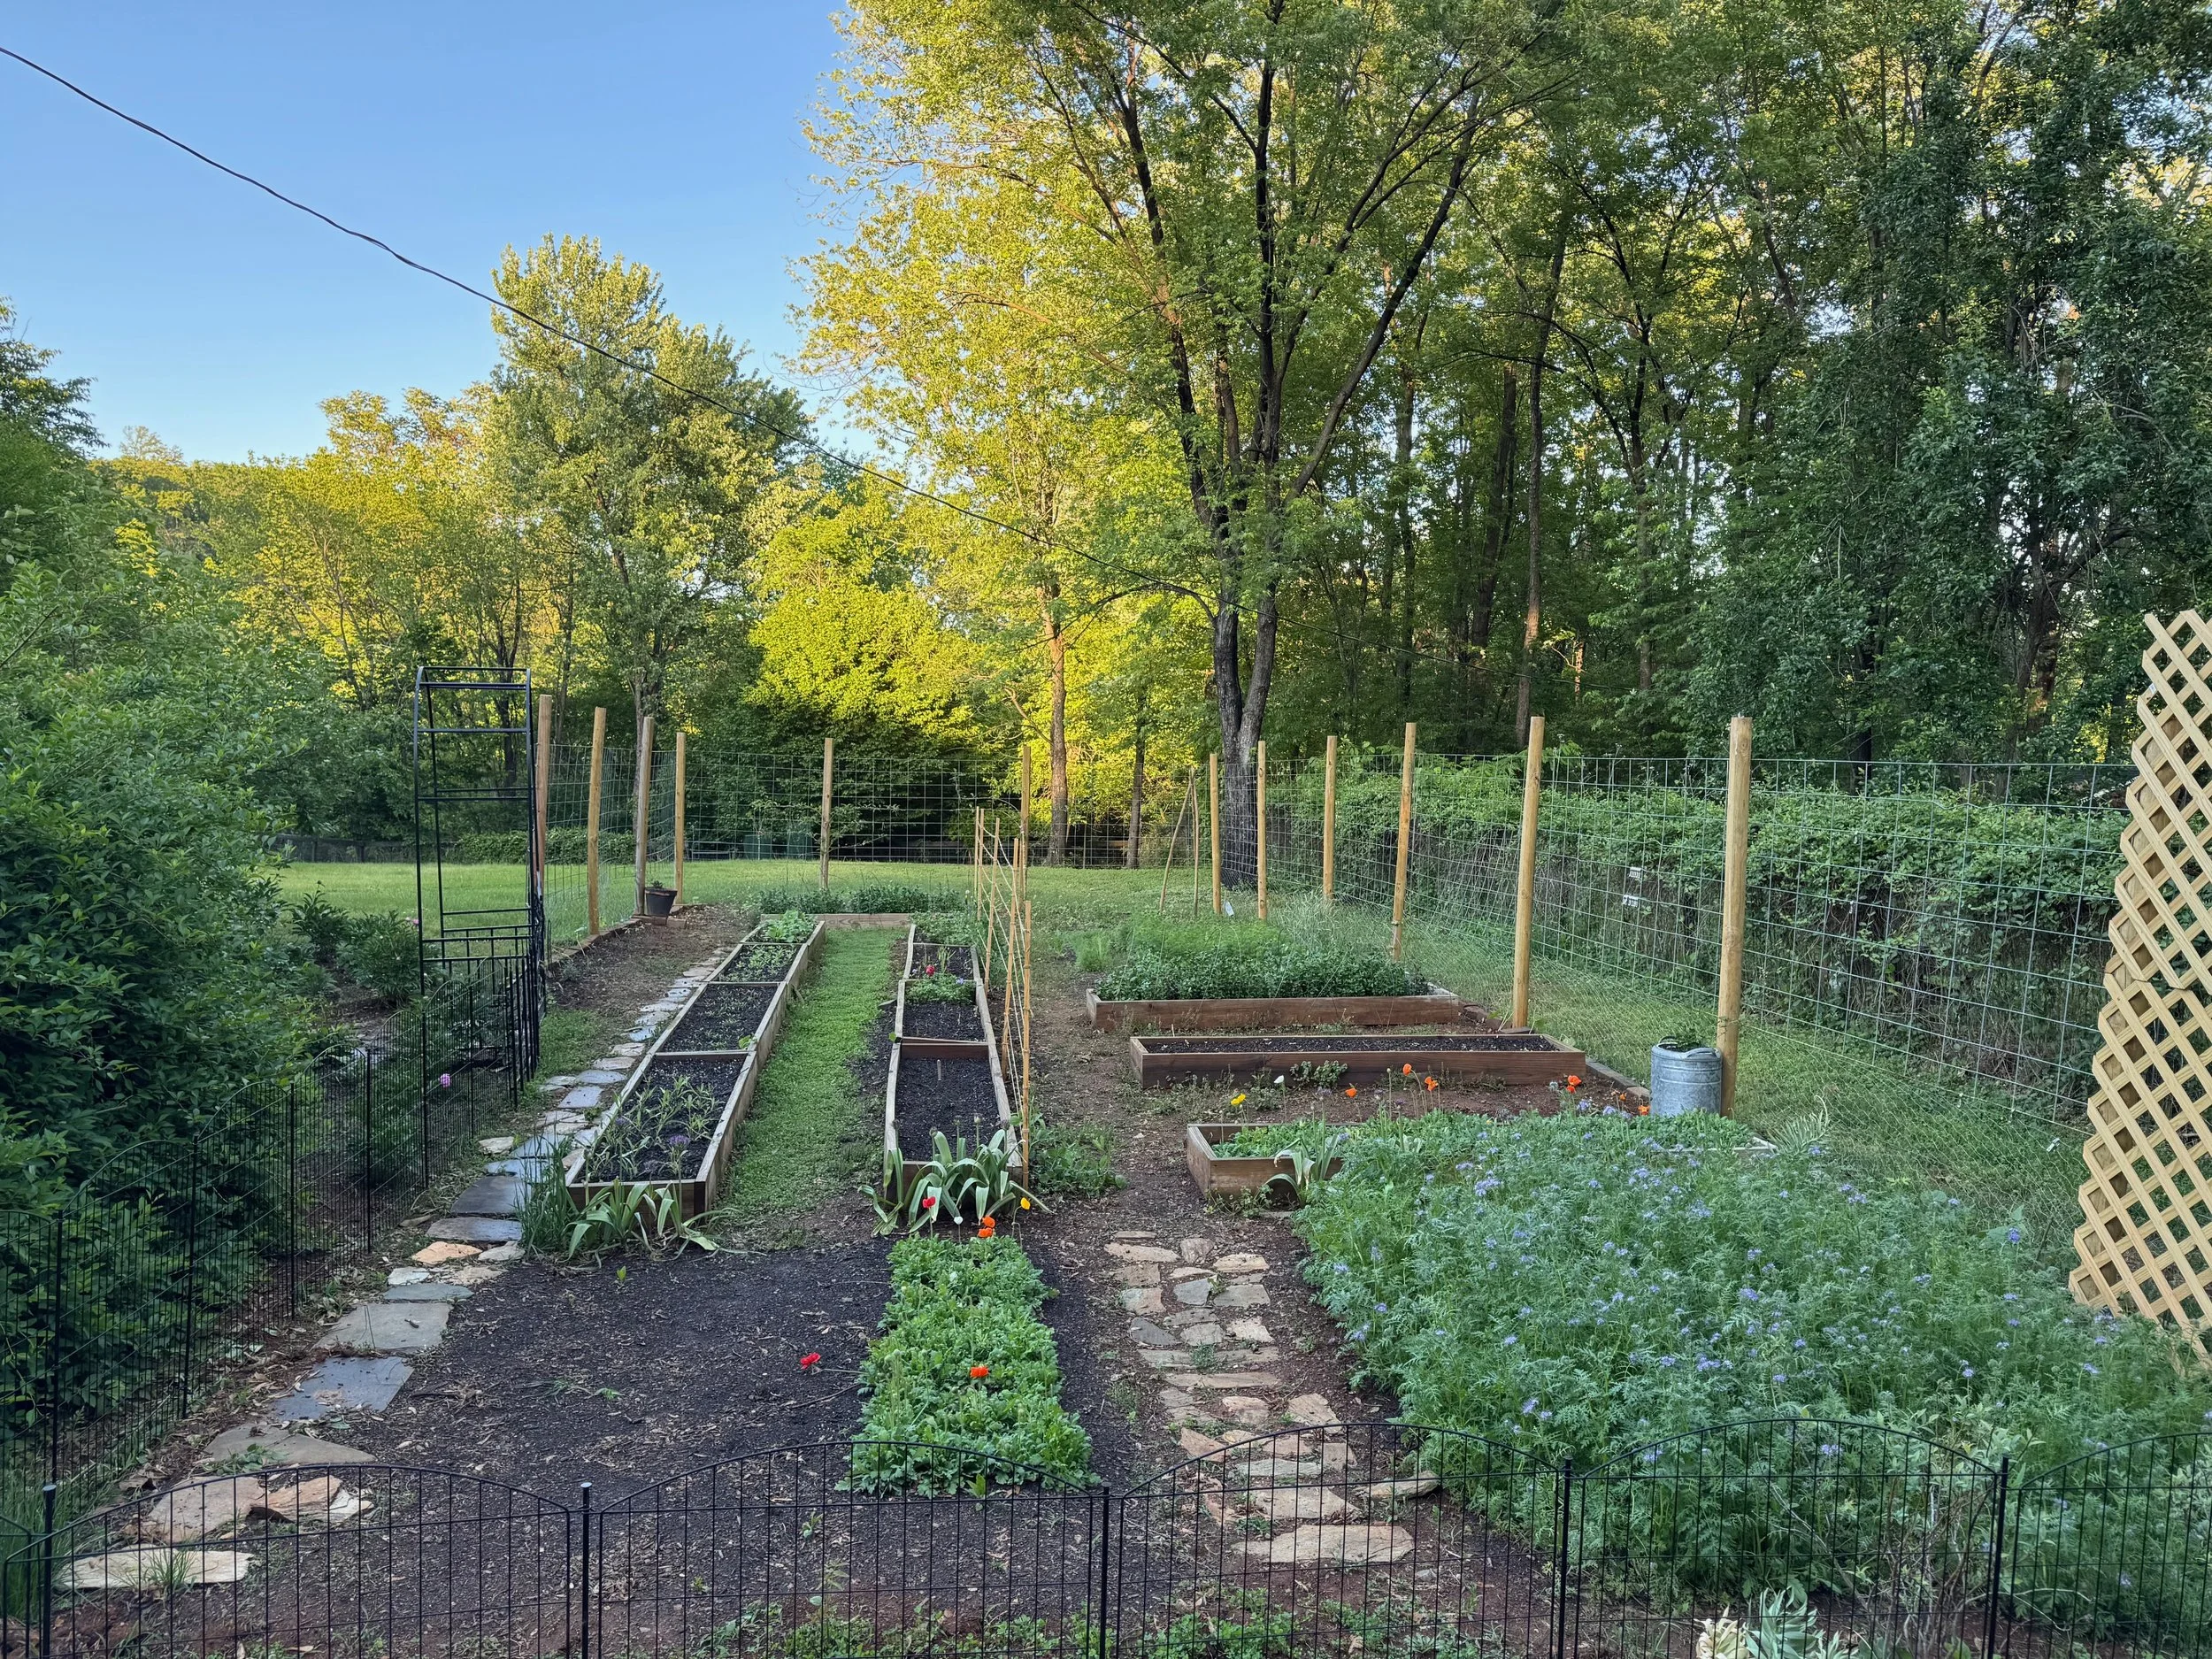
The new cutting garden outside of my backyard studio: this was just a big piece of ground in October before a friend tilled it up and moving as many of the pieces as we could from the old farm happened to make a quick set up. Function over form here.
I’m so excited to have gotten a few perennial vines in the ground within the cutting garden - and one in a refurbished vintage water cooler. Silver Lace Vine is said to be a prolific grower that’s hard to kill, so fingers crossed it fills the wonky cow panel fence soon. The dream is to one day make a walled garden with this exact same footprint, but for now there’s 482 more important things to invest time and money into. But until then, vines will hopefully do the trick.
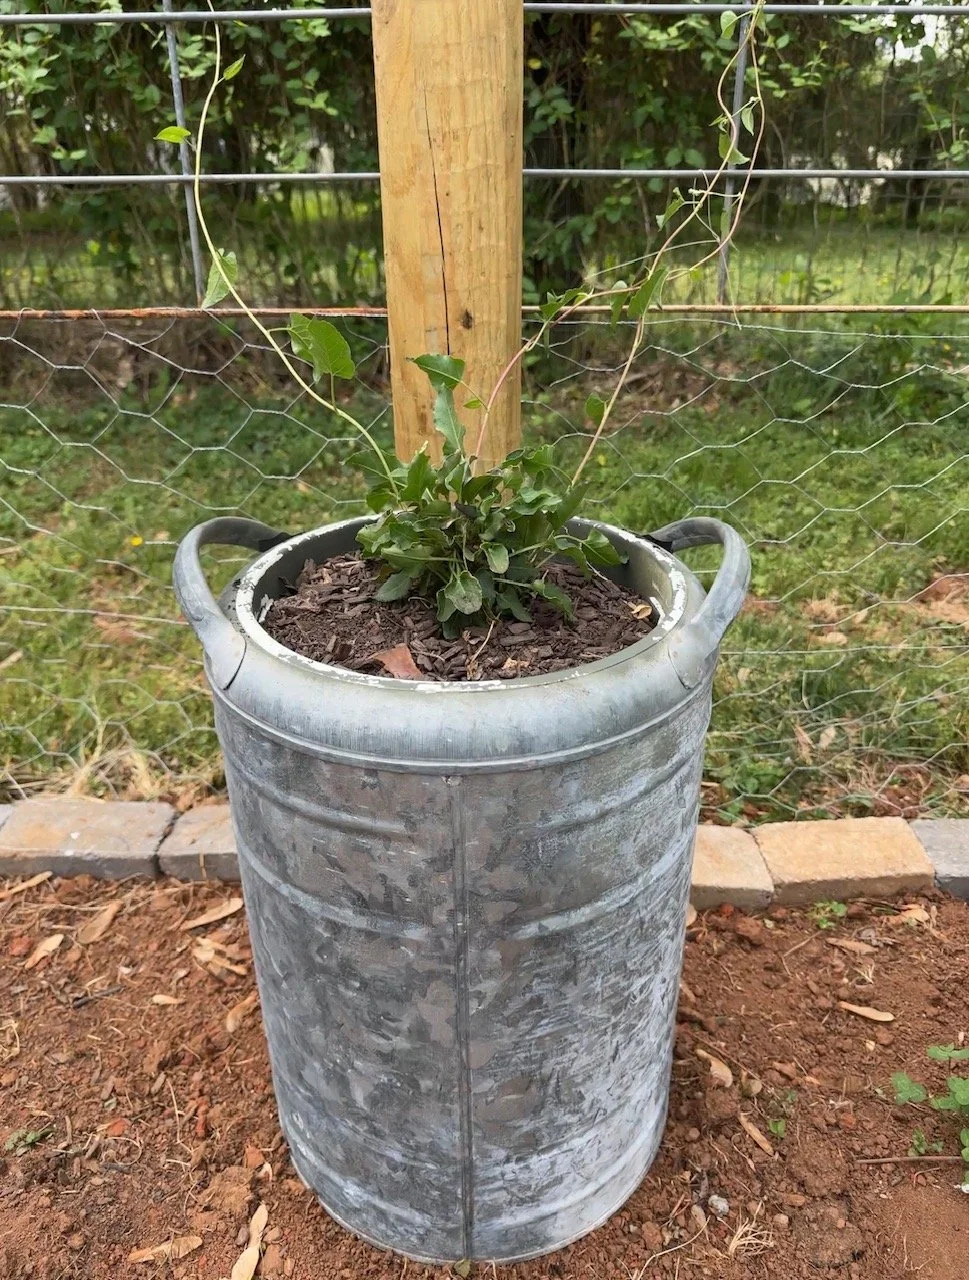
But back to the water cooler, turns out that if you remove the spout, it’s a free draining plant pot with lots of room for roots to grow! Silver Lace Vine has the potential to become invasive, and because we will most likely be attempting to forever control the Wisteria that was allowed to go wild for the past 15 years and has literally taken over half our yard, I’m taking no chances.
This is all wisteria, and if you multiply this picture by 100 then you’ll get an idea of what we’re dealing with. I’m sure whoever planted this had the best of intentions but sheesh it’s a nightmare.
The peony garden that was a huge push to get into the ground this fall is shaping up nicely. Lots of weeds to keep under check for now because of the quick till/plant process, but nothing that we can’t handle. Thankfully the plants should do the job of suppressing them in a few years, and this week I planted a couple of boxwoods to start making a bit of a barrier around this garden. Slightly old school rectangular is what I’m going for here. Much different than my normal loose, rounded edge garden border style but one that’s meant to have straight lines for practical mowing reasons. Sometimes you have to choose function over form. The cat mint and asters I planted amongst the beds will hopefully soften it a bit.

September 2025: an overgrown garden and little piles of bricks and stone
The new peony garden, April 28, 2026
Back to the cutting garden: tuberose, cosmos, gomphrena, celosia, nasturtium, borage, and strawberries are now filling the boxes that housed tulips not too long ago.
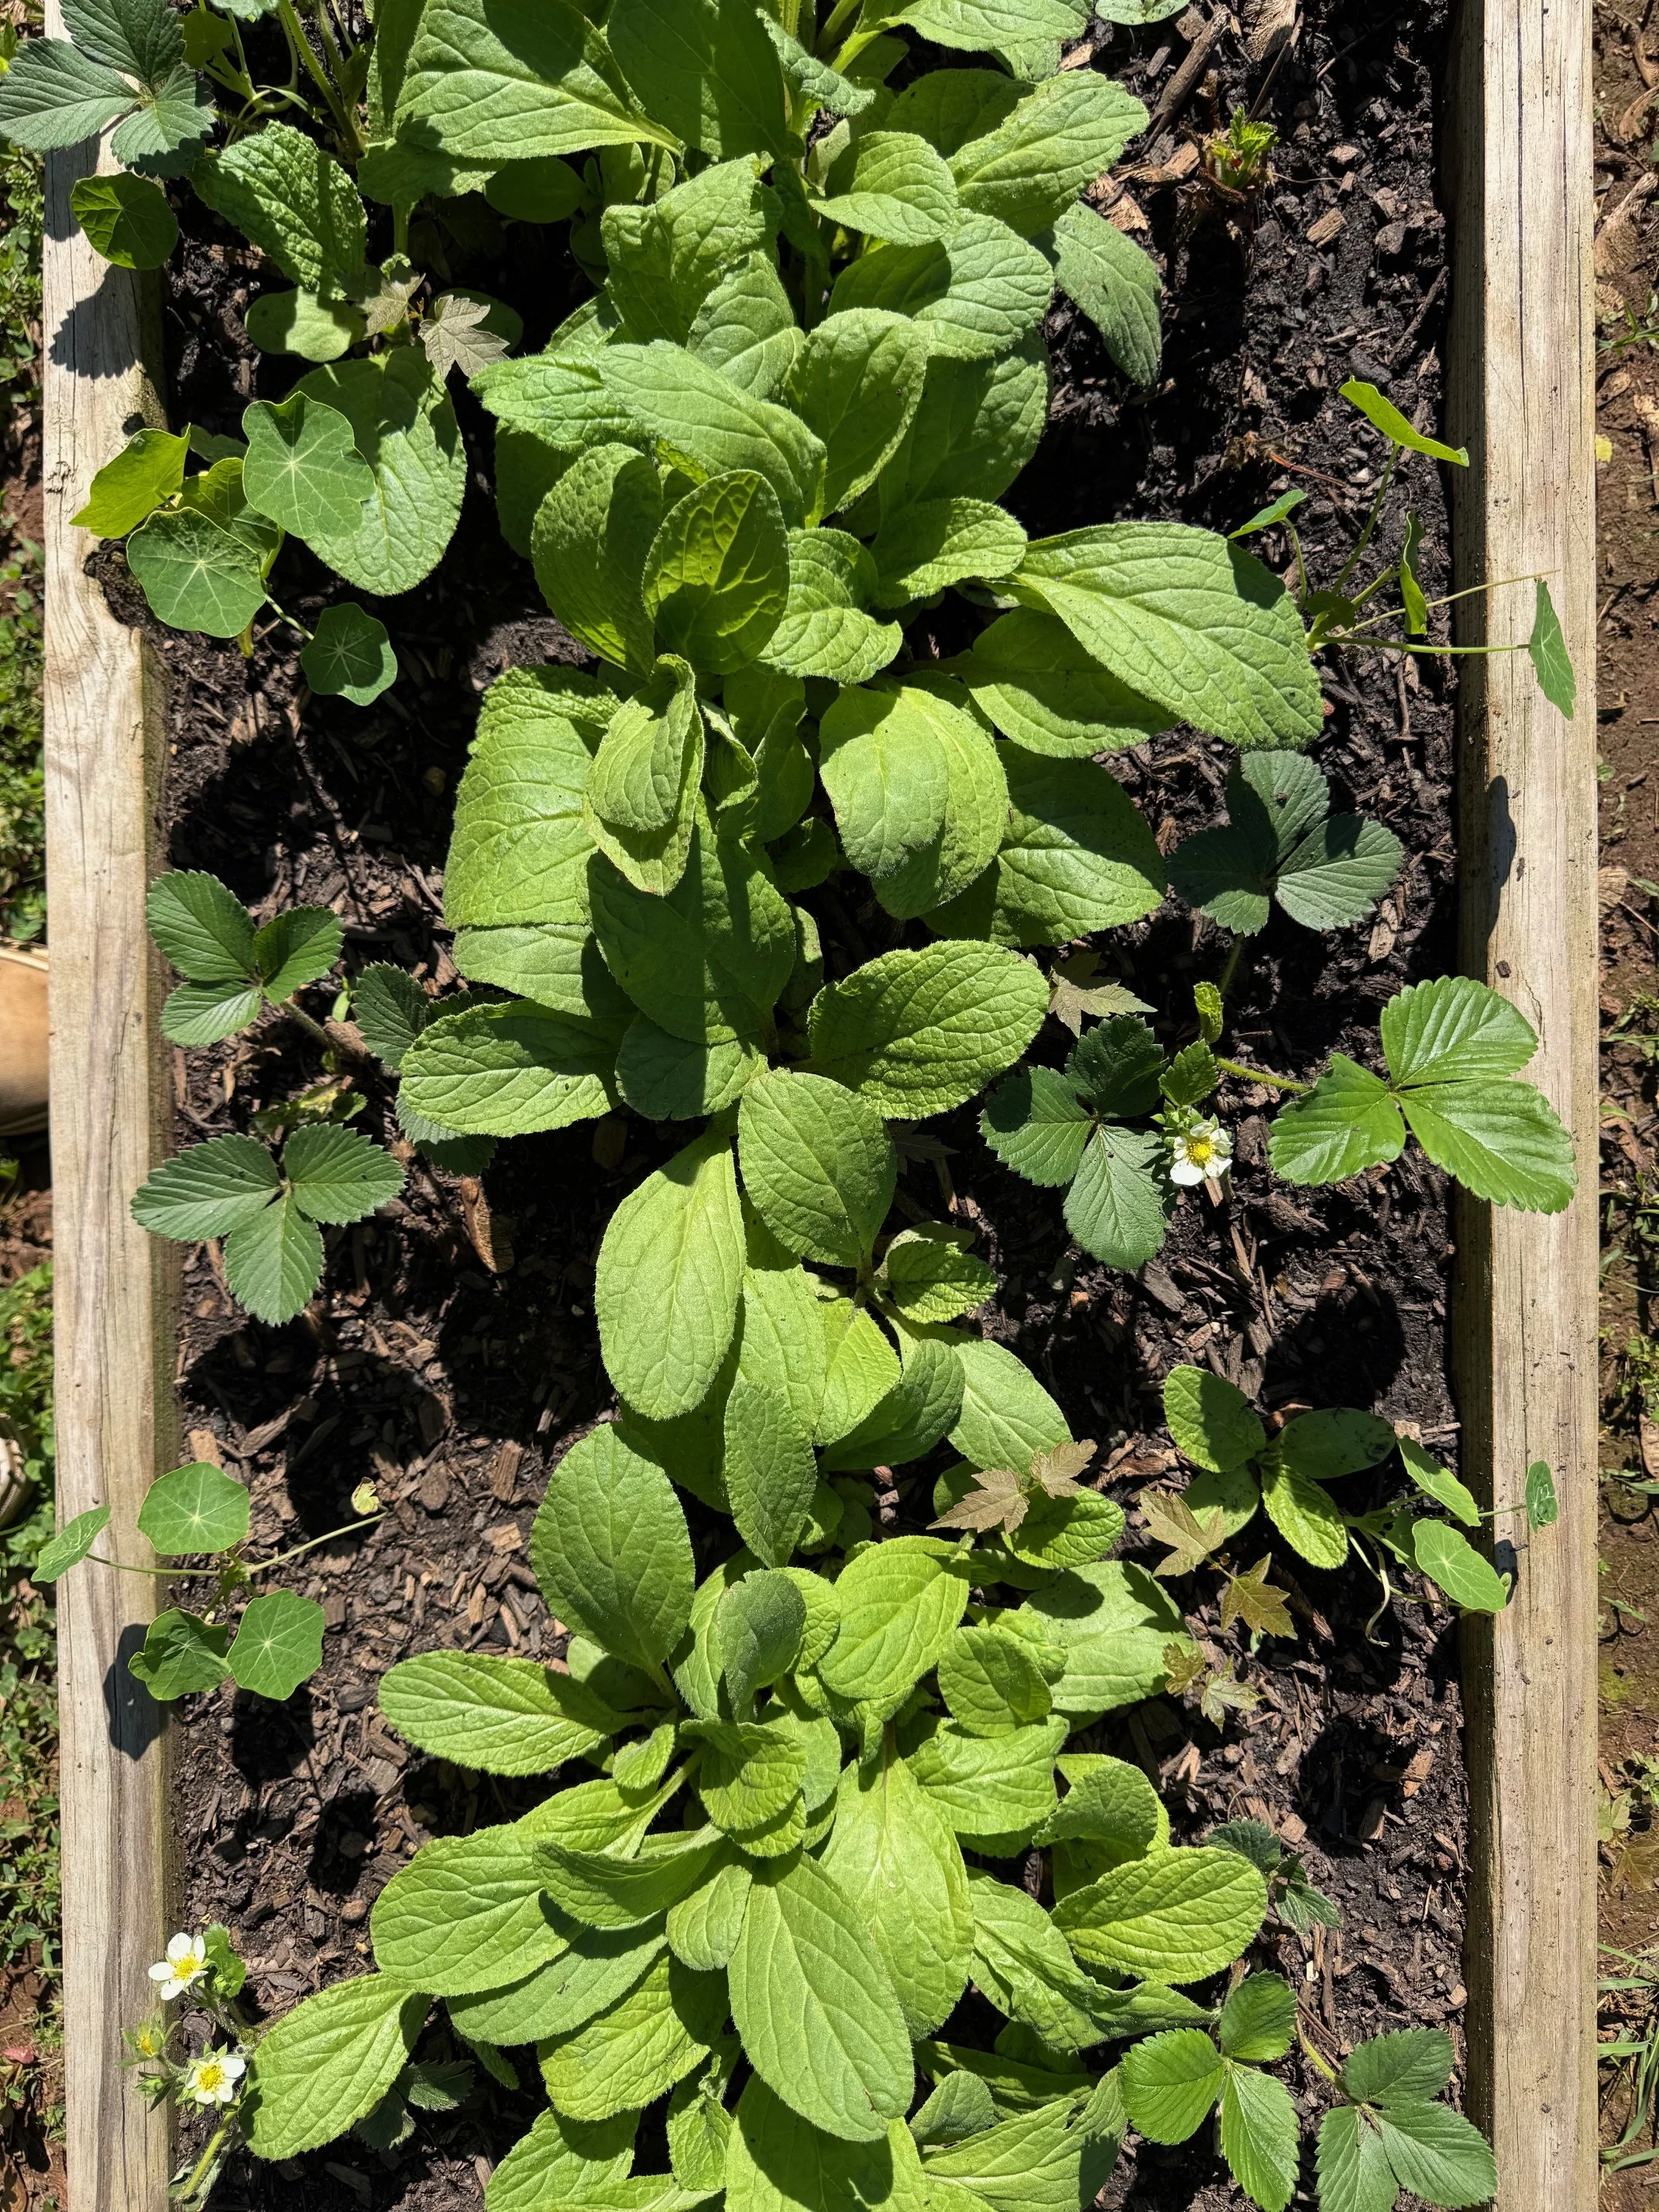
borage + strawberries + nasturtium
Until next week,
xxLindsey
p.s. if you’re curious to see some of the blog posts from my old website, here’s a couple of favorites

Bulb Lasagnas
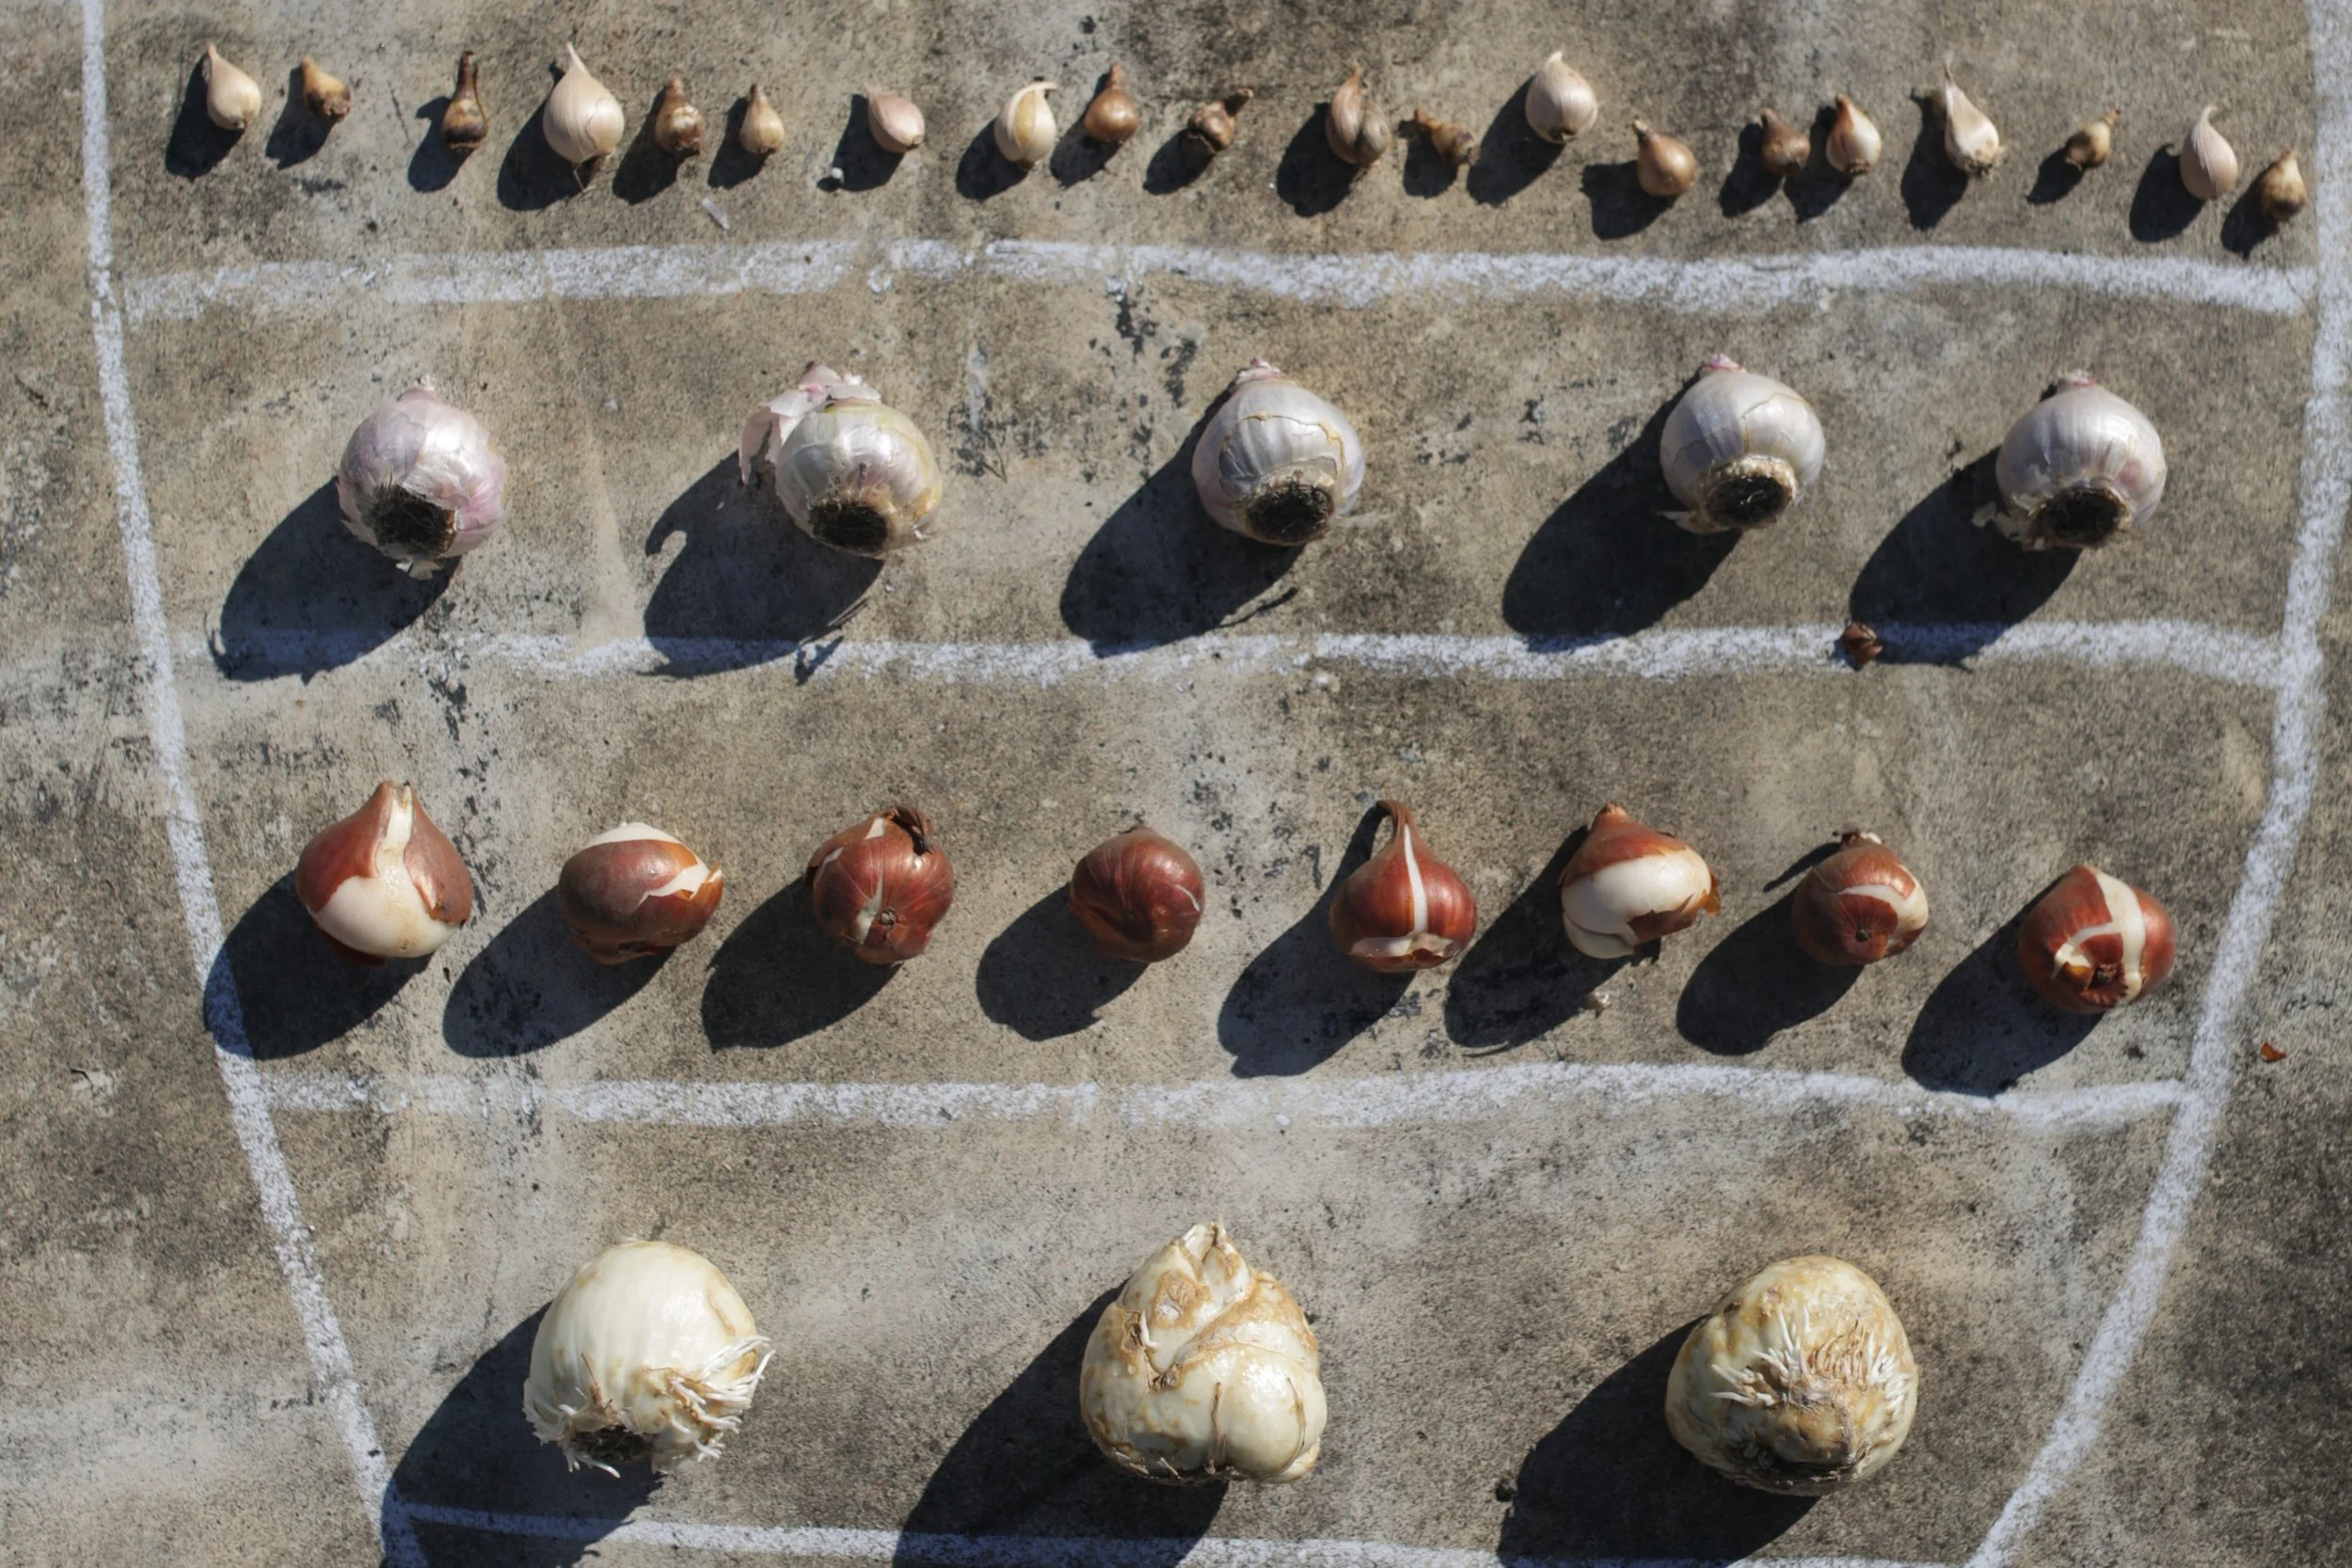
If you want to make the most of out a spring planted container (or whole garden of containers), bulb lasagnas are the best planting approach to take. Simply put, instead of doing one top layer of bulbs per pot, you choose bulbs that bloom at different times throughout the spring and plant them in layers in one container. It’s a game changer!
Click on the link below to learn more and also get some great recipes to get you started. Enjoy!
Bulb Lasagna Recipes For a Full Spring Show
P.S. If you landed here because you found me on Substack, thank you! If you haven’t seen me over on Substack, you can find me here - there you’ll find a video of me planting a bulb lasagna (the November 14 episode). It’s part of a free Flowering Fridays series that gives tips and tricks on flower growing and arranging every week. Hope to see you there!

Hellebores: the perfect shade loving flower of early spring
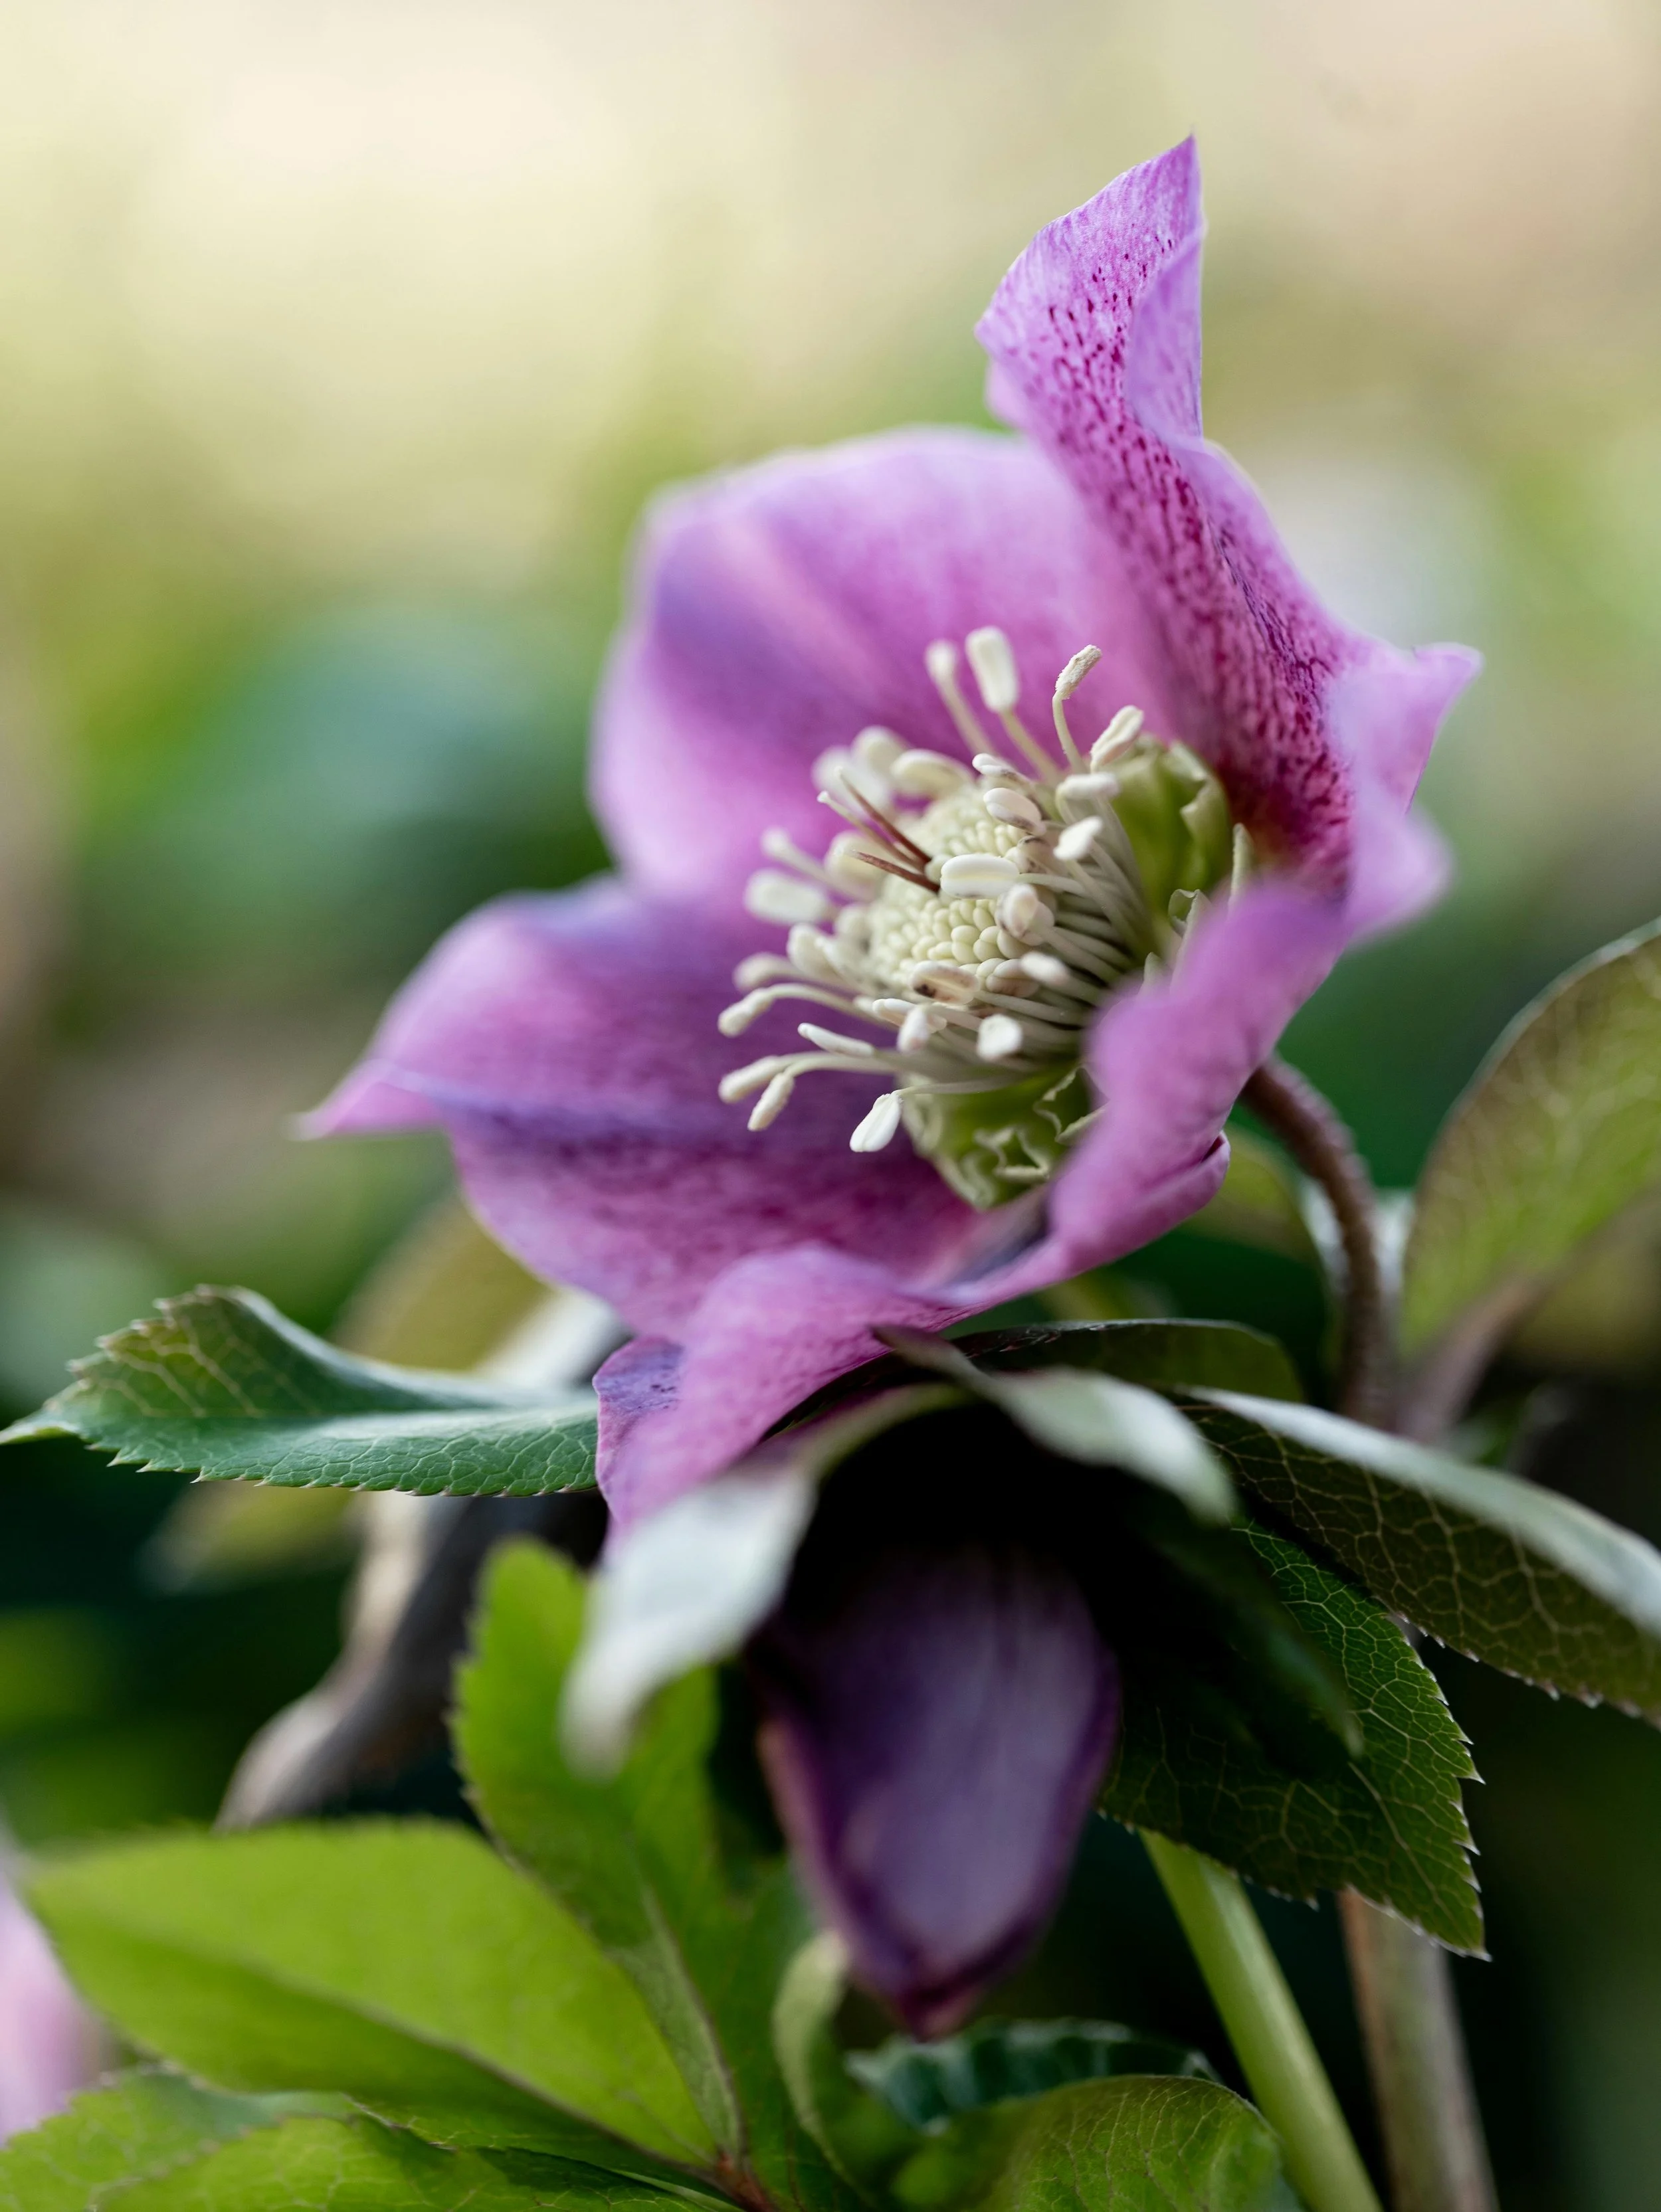
Hellebores, often called Lenten Roses, are one of the earliest perennials to bloom—sometimes even peeking through the snow!
Their delicate, nodding flowers and evergreen foliage make them a favorite among those who crave early spring color. The fact that they’re also shade loving plants that deer and other critters rarely touch make them a rare jewel in the flower growing world.
Below you’ll find information on how to grow them, favorite varieties, and tips for harvesting.
How to Grow Hellebores
Hellebores are hardy, low-maintenance plants that thrive in shady or partially shaded spots. Here’s what they love:
Soil: Rich, well-drained soil with plenty of organic matter.
Light: Partial to full shade. Morning sun with afternoon shade is ideal.
Water: Keep soil moist but not soggy. Once established, they’re fairly drought-tolerant.
Planting: Fall or early spring is the best time to plant them. Give them space—they don’t like being disturbed once settled.
How to Include Hellebores in Your Landscape
Hellebores are wonderful for putting into edges of woods and under deciduous trees. Because they’re early bloomers, they add interest to spaces that are blank in early spring, but they won’t compete with the gorgeous fall colors of trees such as maple and Gingko.
Hellebores will very slowly grow and spread to create a lush evergreen carpet where they’re planted! It may be a couple of years before you have a true harvest of blooms, but the wait is surely worth it - and they’ll continue to provide you with more and more as the years go on.
Hellebores can also be grown in pots, just be sure to use a large enough one that will allow it to expand, and leave it in the spot that’s shady or partially shady.
Top 3 Hellebore Varieties to Grow
Helleborus orientalis (Lenten Rose)
A classic variety that naturalizes well, producing large flowers in shades of pink, purple, and even near-black.Helleborus 'Winter Jewels' Series
This series is known for its unique color patterns—mottled, double, and speckled blooms in purples, pinks, and whites.Helleborus 'Ivory Prince'
Compact and tidy, this variety produces creamy white blooms with hints of pink and green, perfect for containers or borders.
How to Harvest Hellebores in Spring
Hellebores make beautiful, long-lasting cut flowers—if harvested correctly. Here’s how:
Wait until the blooms mature – Look for flowers where the stamens have dropped and seed pods are starting to form. Immature blooms wilt quickly when cut.
Cut at the base of the stem using clean, sharp scissors or garden snips.
Condition the stems by placing them in warm water for several hours before arranging them in a vase.
Tip: For longer vase life, sear the ends of the stems with boiling water or a flame for a few seconds, or use a flame to singe the bottom of the stem.
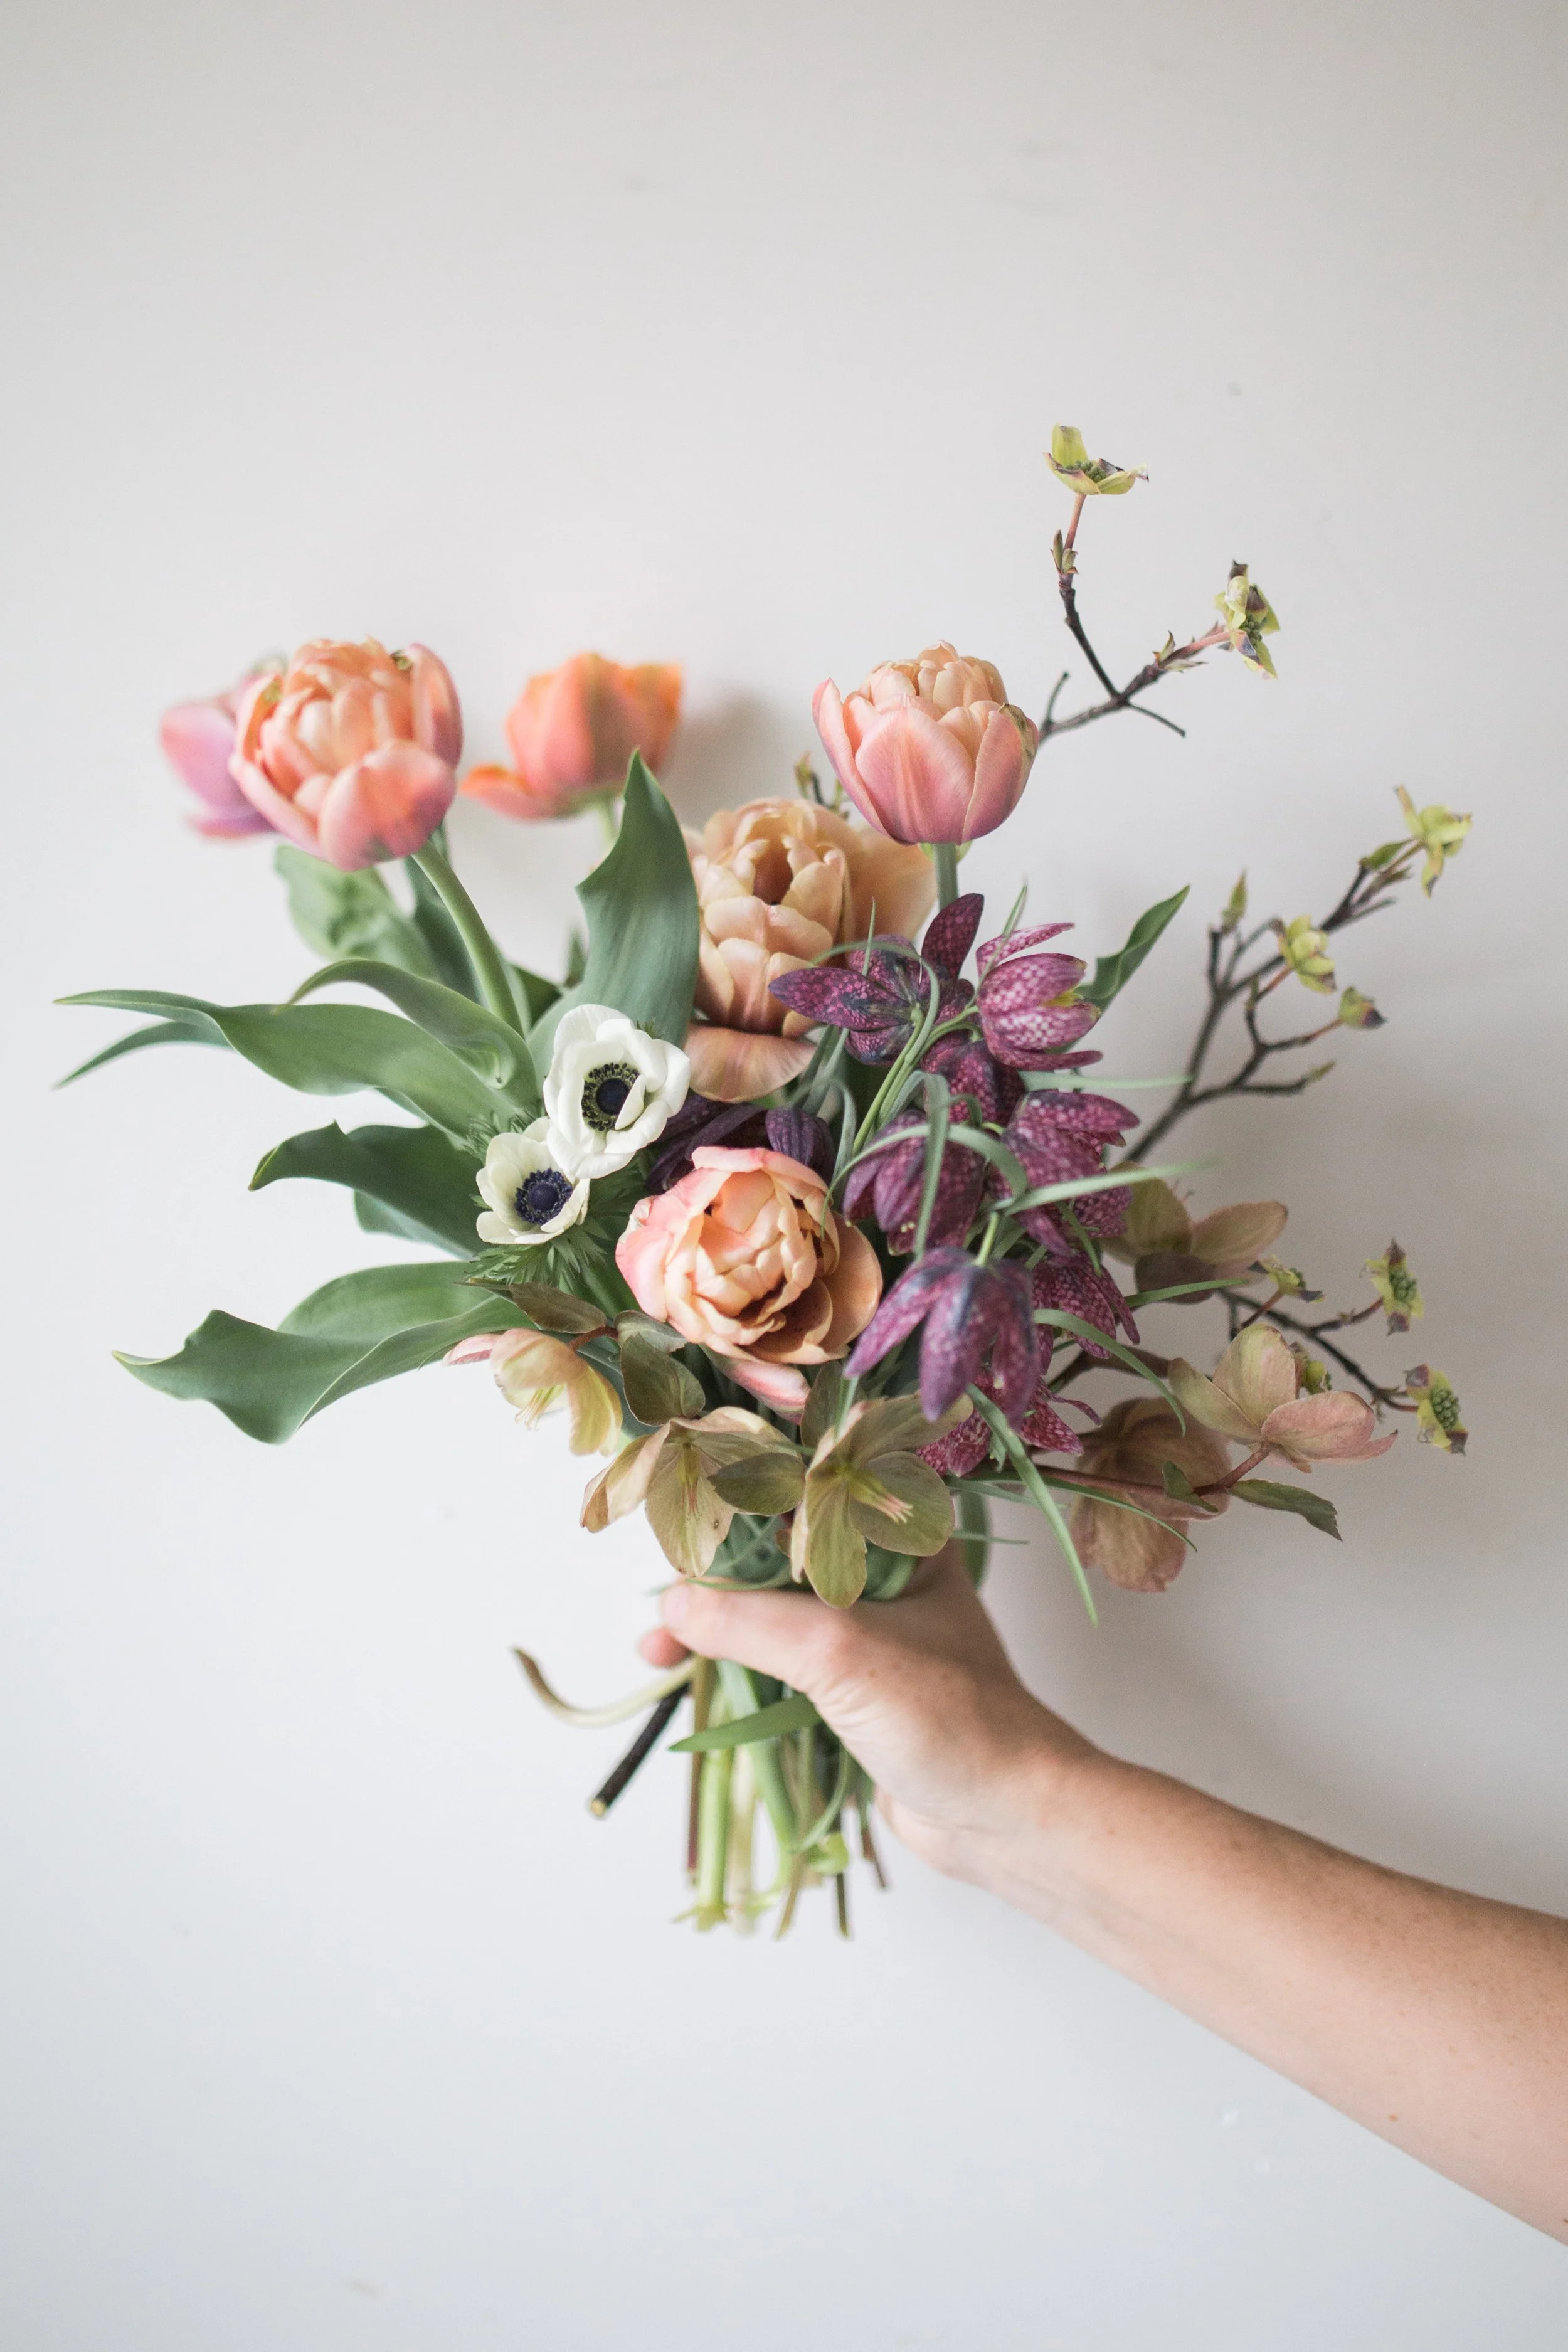
An early spring bouquet featuring hellebores as the outer edge ingredient.
Whether you're a seasoned gardener or just starting out, hellebores are an easy-to-grow flower that provide you with a wonderful way to add beauty to your early spring garden. Give them the right spot and a little patience, and they’ll reward you with years of graceful blooms!

Real Wedding Inspo, A la Carte Style
I felt so lucky to be the florist chosen for Ron and Dalton, two of the kindest souls who were married at the gorgeous Mount Fair Farm (with a greenhouse that made me green with envy).
Dalton and Ron chose the timeless color scheme of green and white, and they fully embraced the a la carte shop and the seasonal, all locally grown model that was used to create their pieces. I loved the way they repurposed the floral runners from the ceremony site at the dance floor - and everything else about their day.
Scroll on down to see the floral highlights and see just how elegant using only seasonal and local flowers can be (and visit The A la Carte Shop to order pieces for your own events, no matter how large or small).

Two of my favorite boutonnieres to date. (photo cred: Jen Fariello)

Ranunculus, gardenia, and sweet william: three of the lovliest May flowers.
The corsages were created to be clipped onto the gowns of the special ladies in Ron and Dalton’s life - no pins and less movement for the win!

A total of 6 floral runners created a small grounded arbor….

that was the perfect size to envelope the two of them and their officiant (photo cred: Jen Fariello)

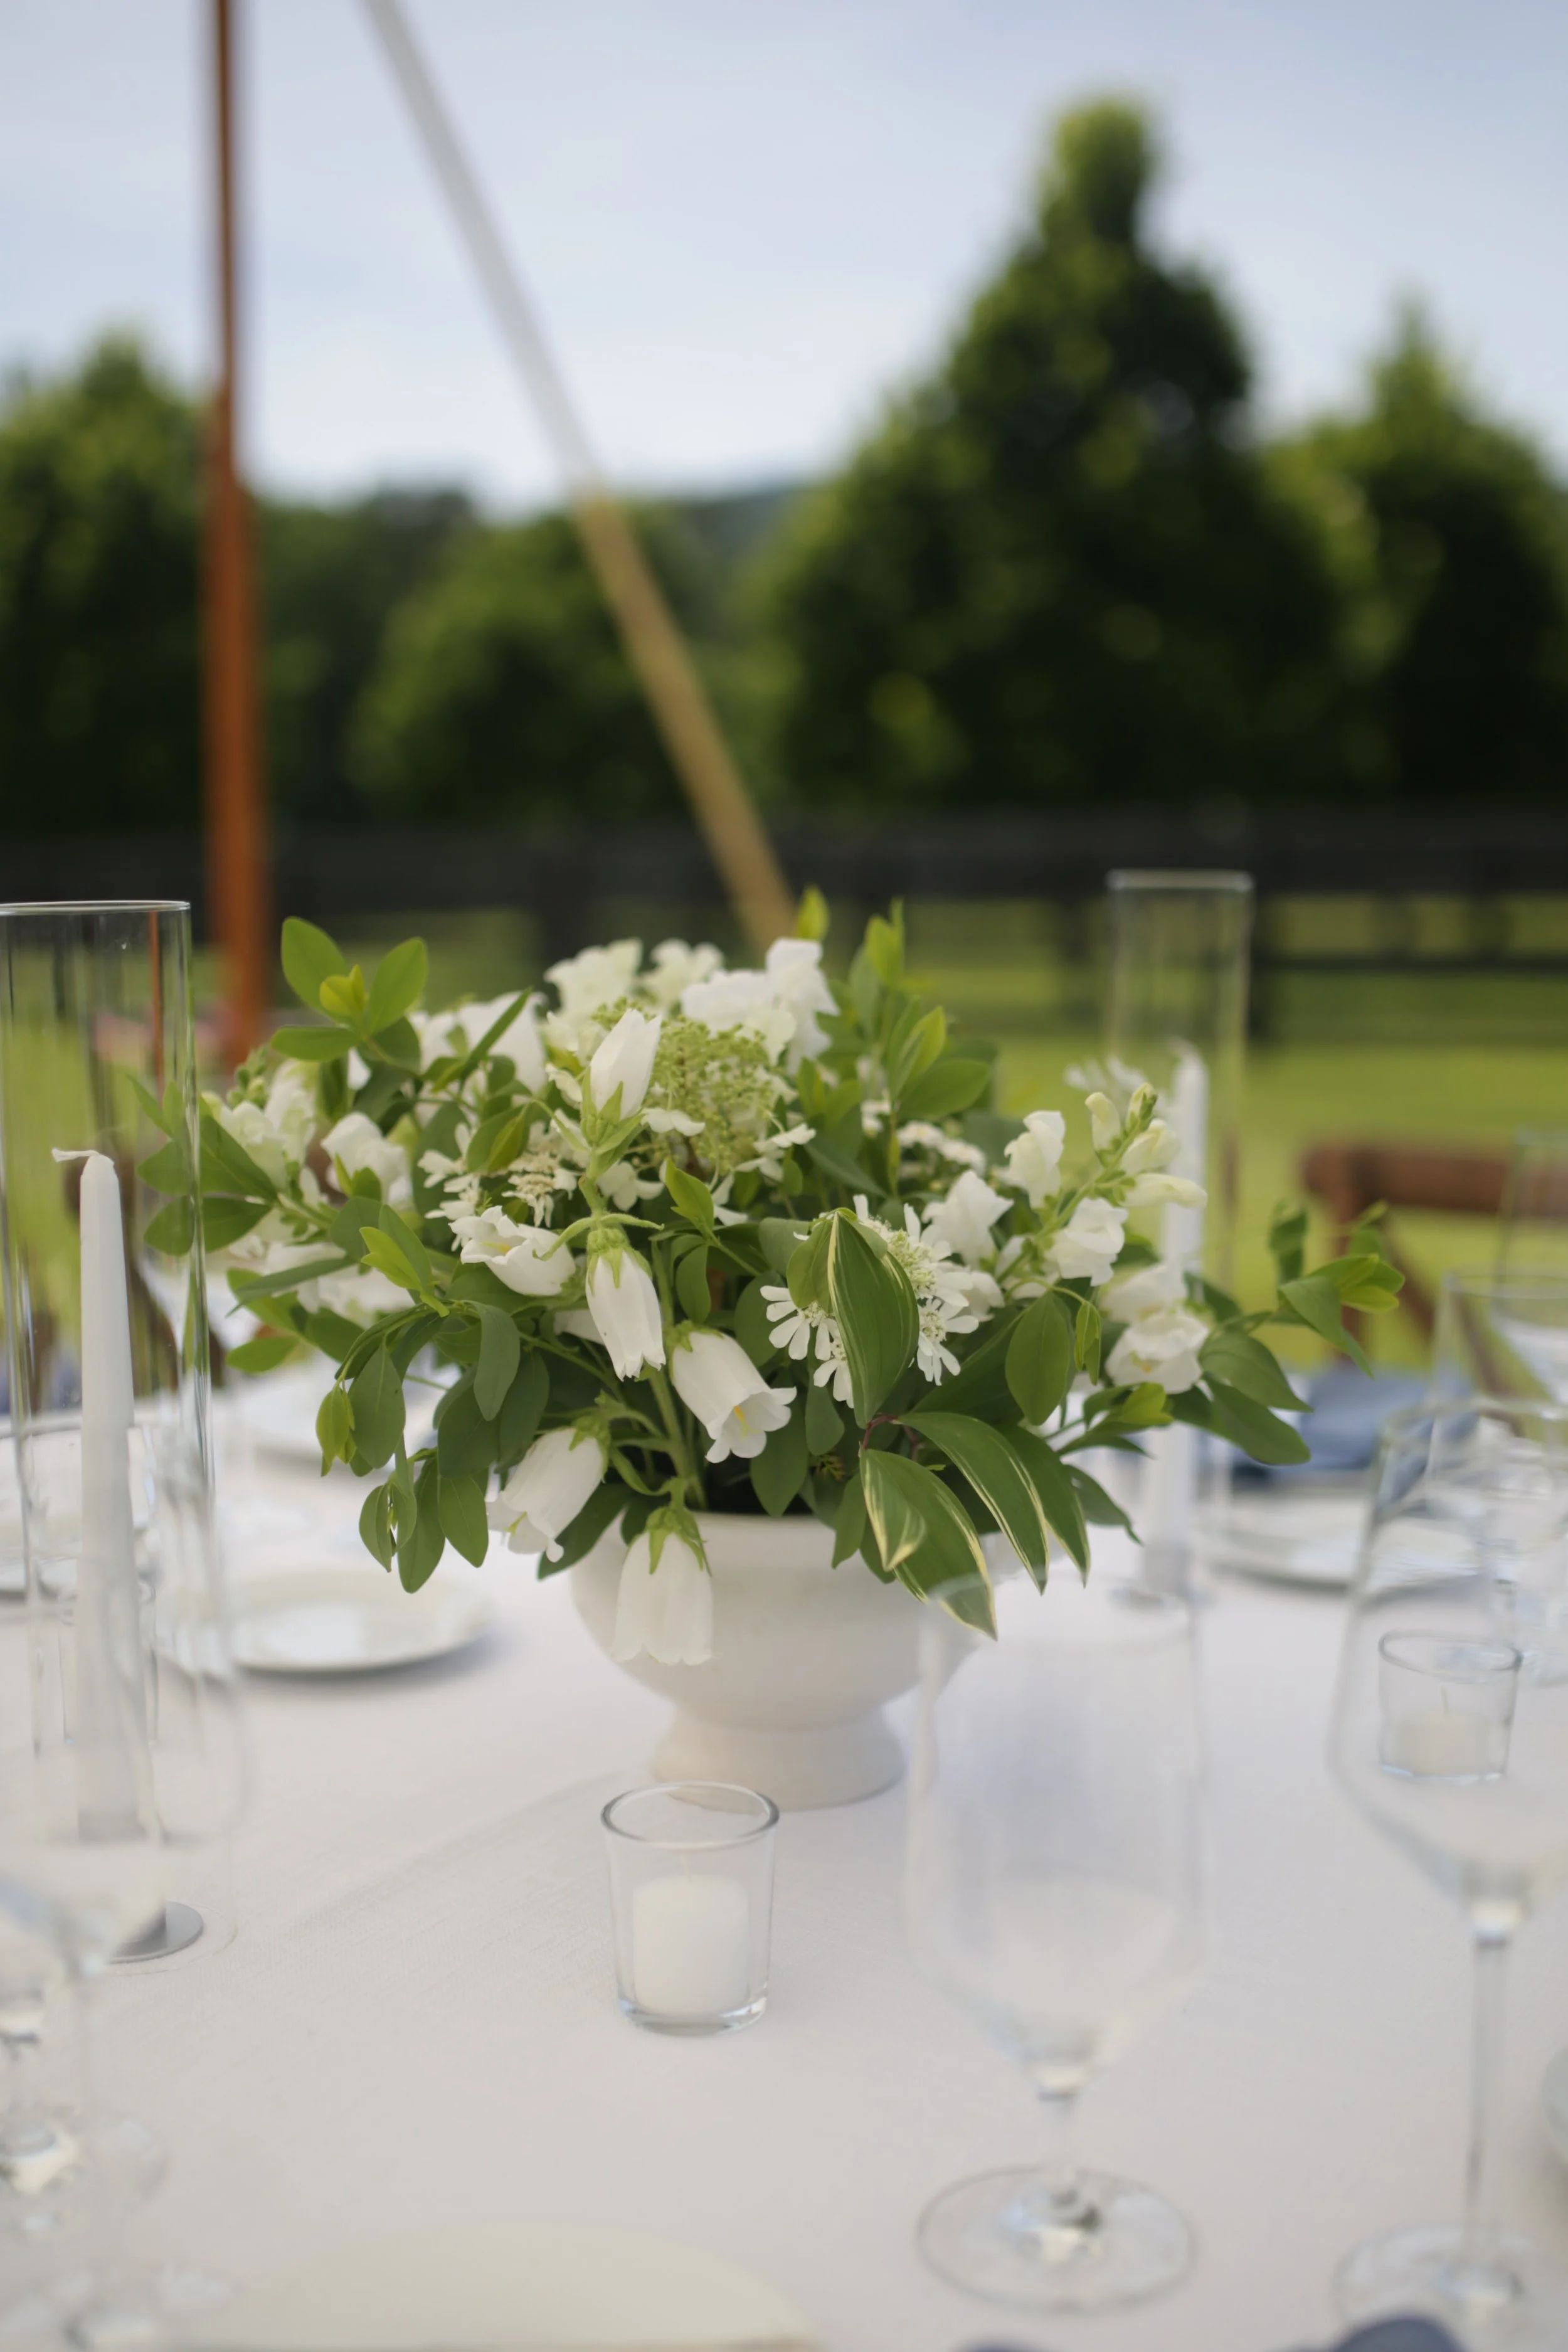
Medium Arrangements were placed along rectangular tables amongst tall candles (which were given to guests to take home with them at the end of the night!)
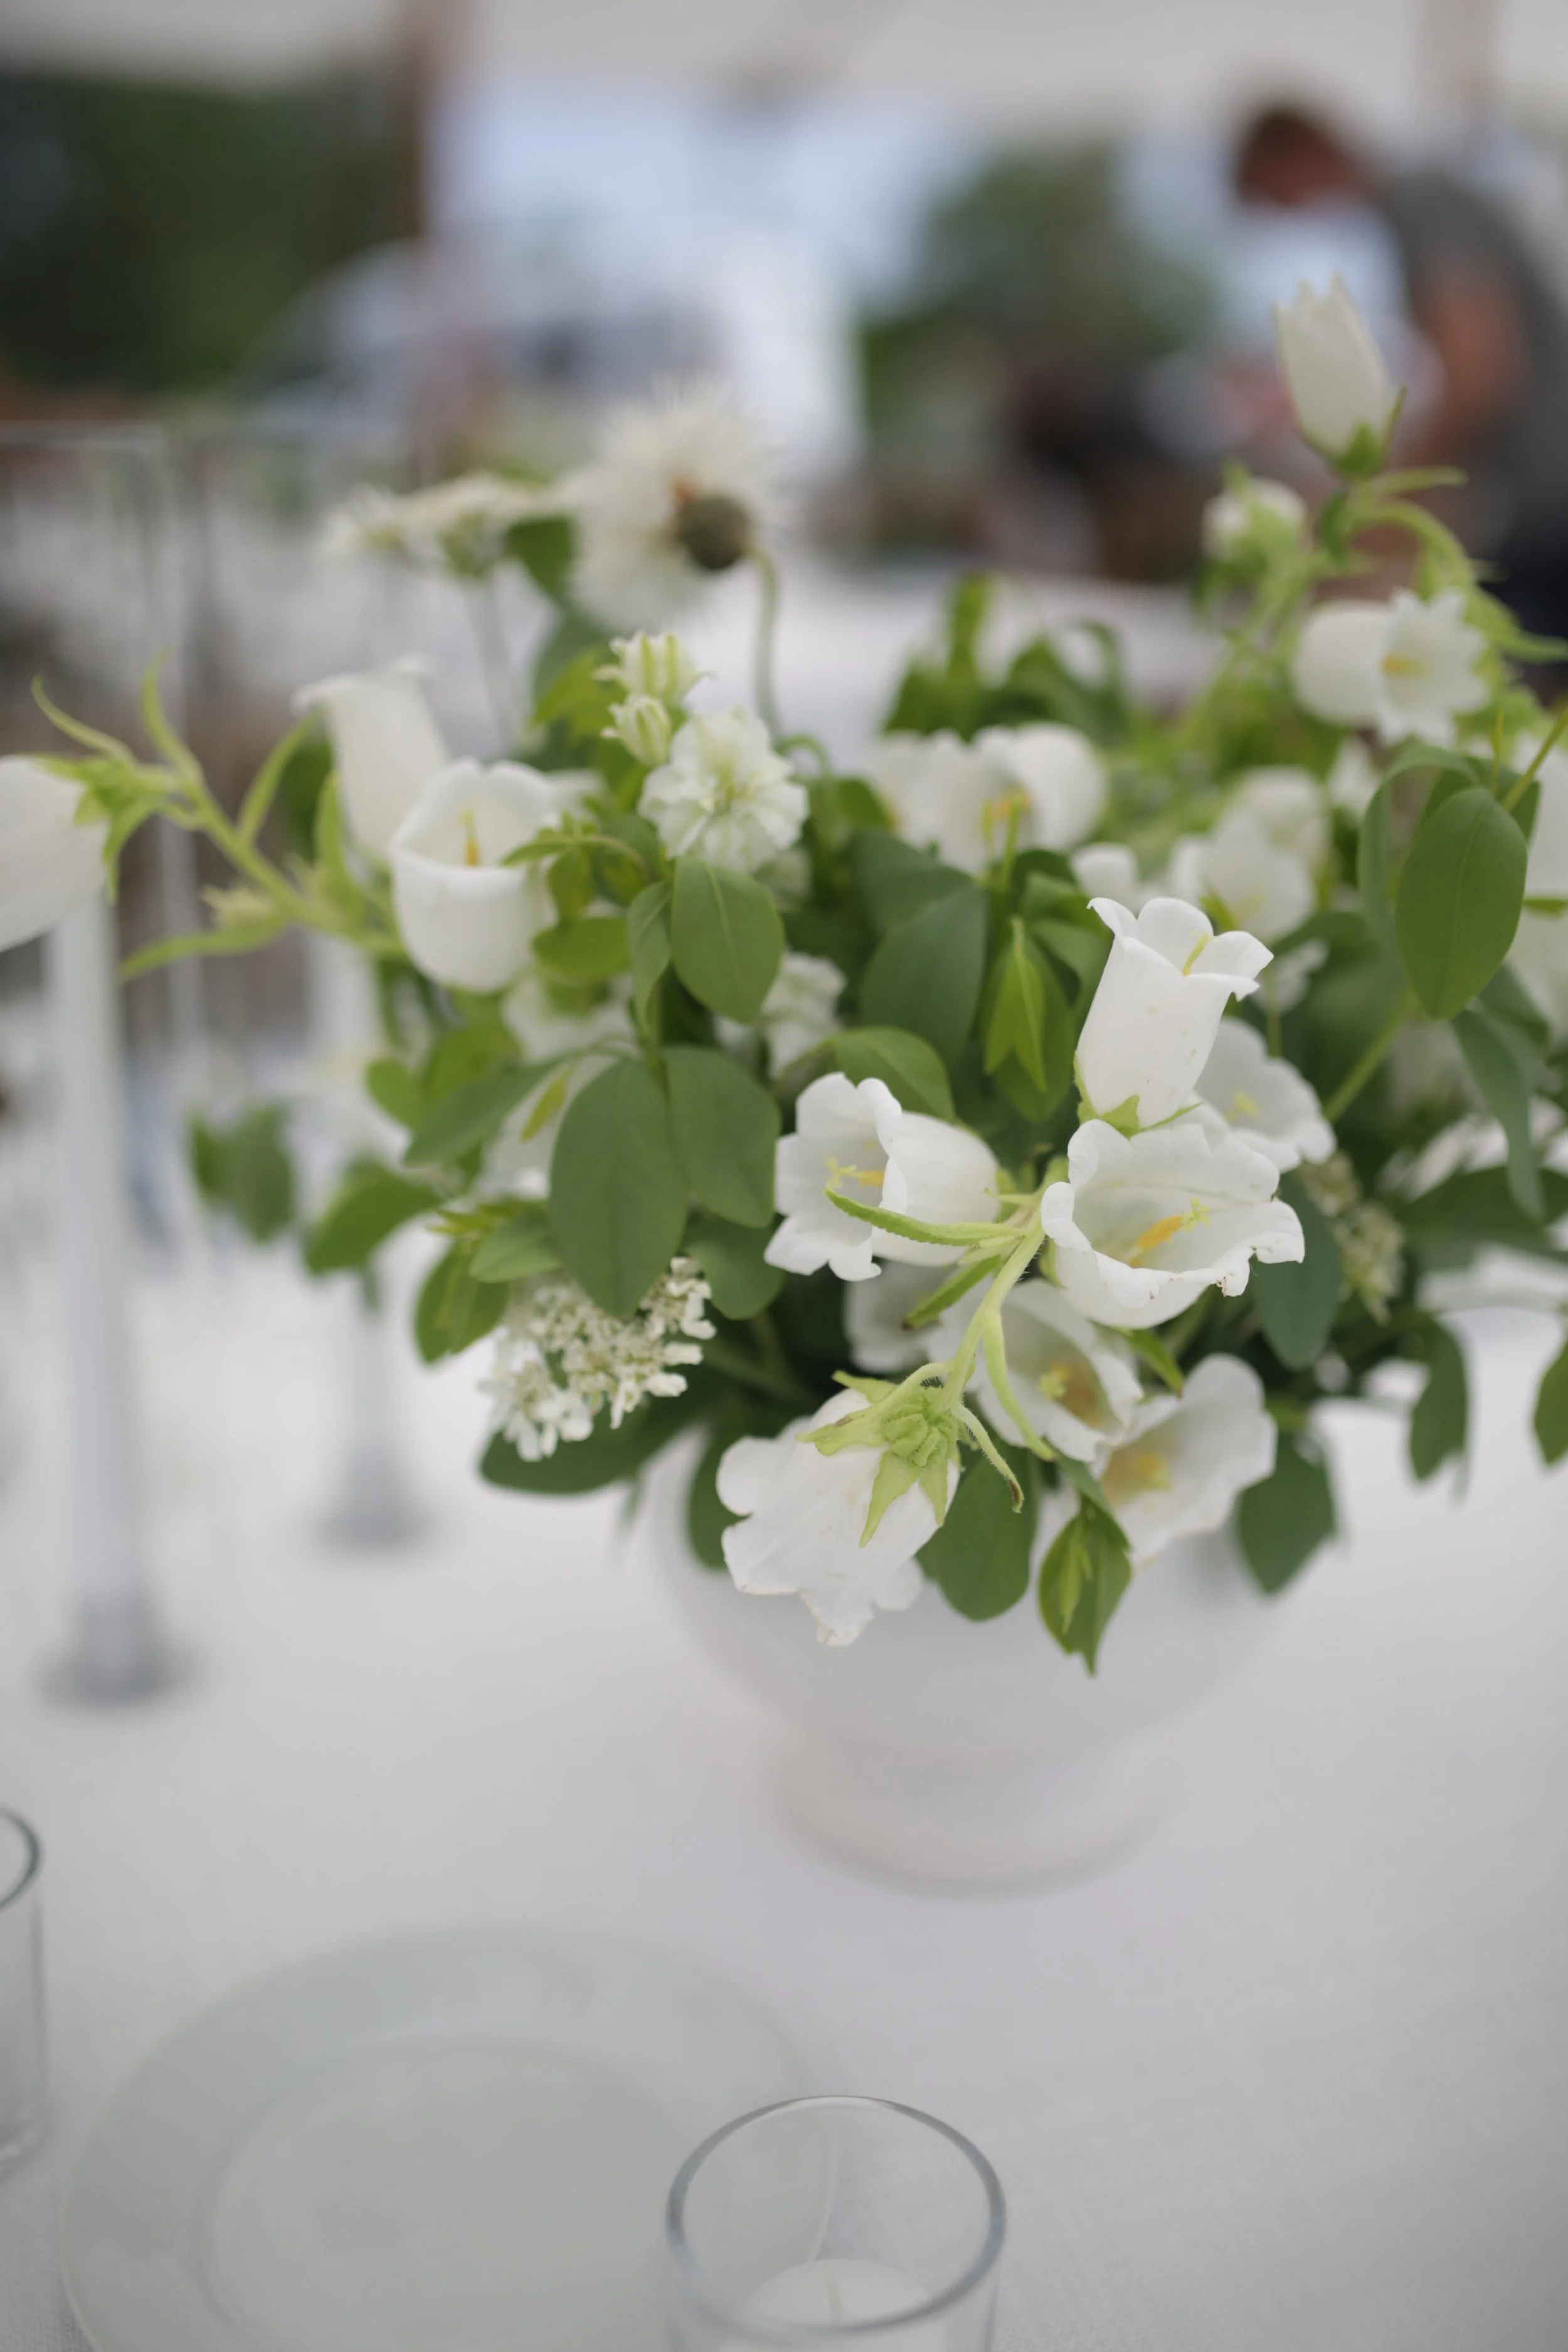
(an up close of the medium)
Large arrangements graced a few circular tables, where there was more depth to cover and less candles.
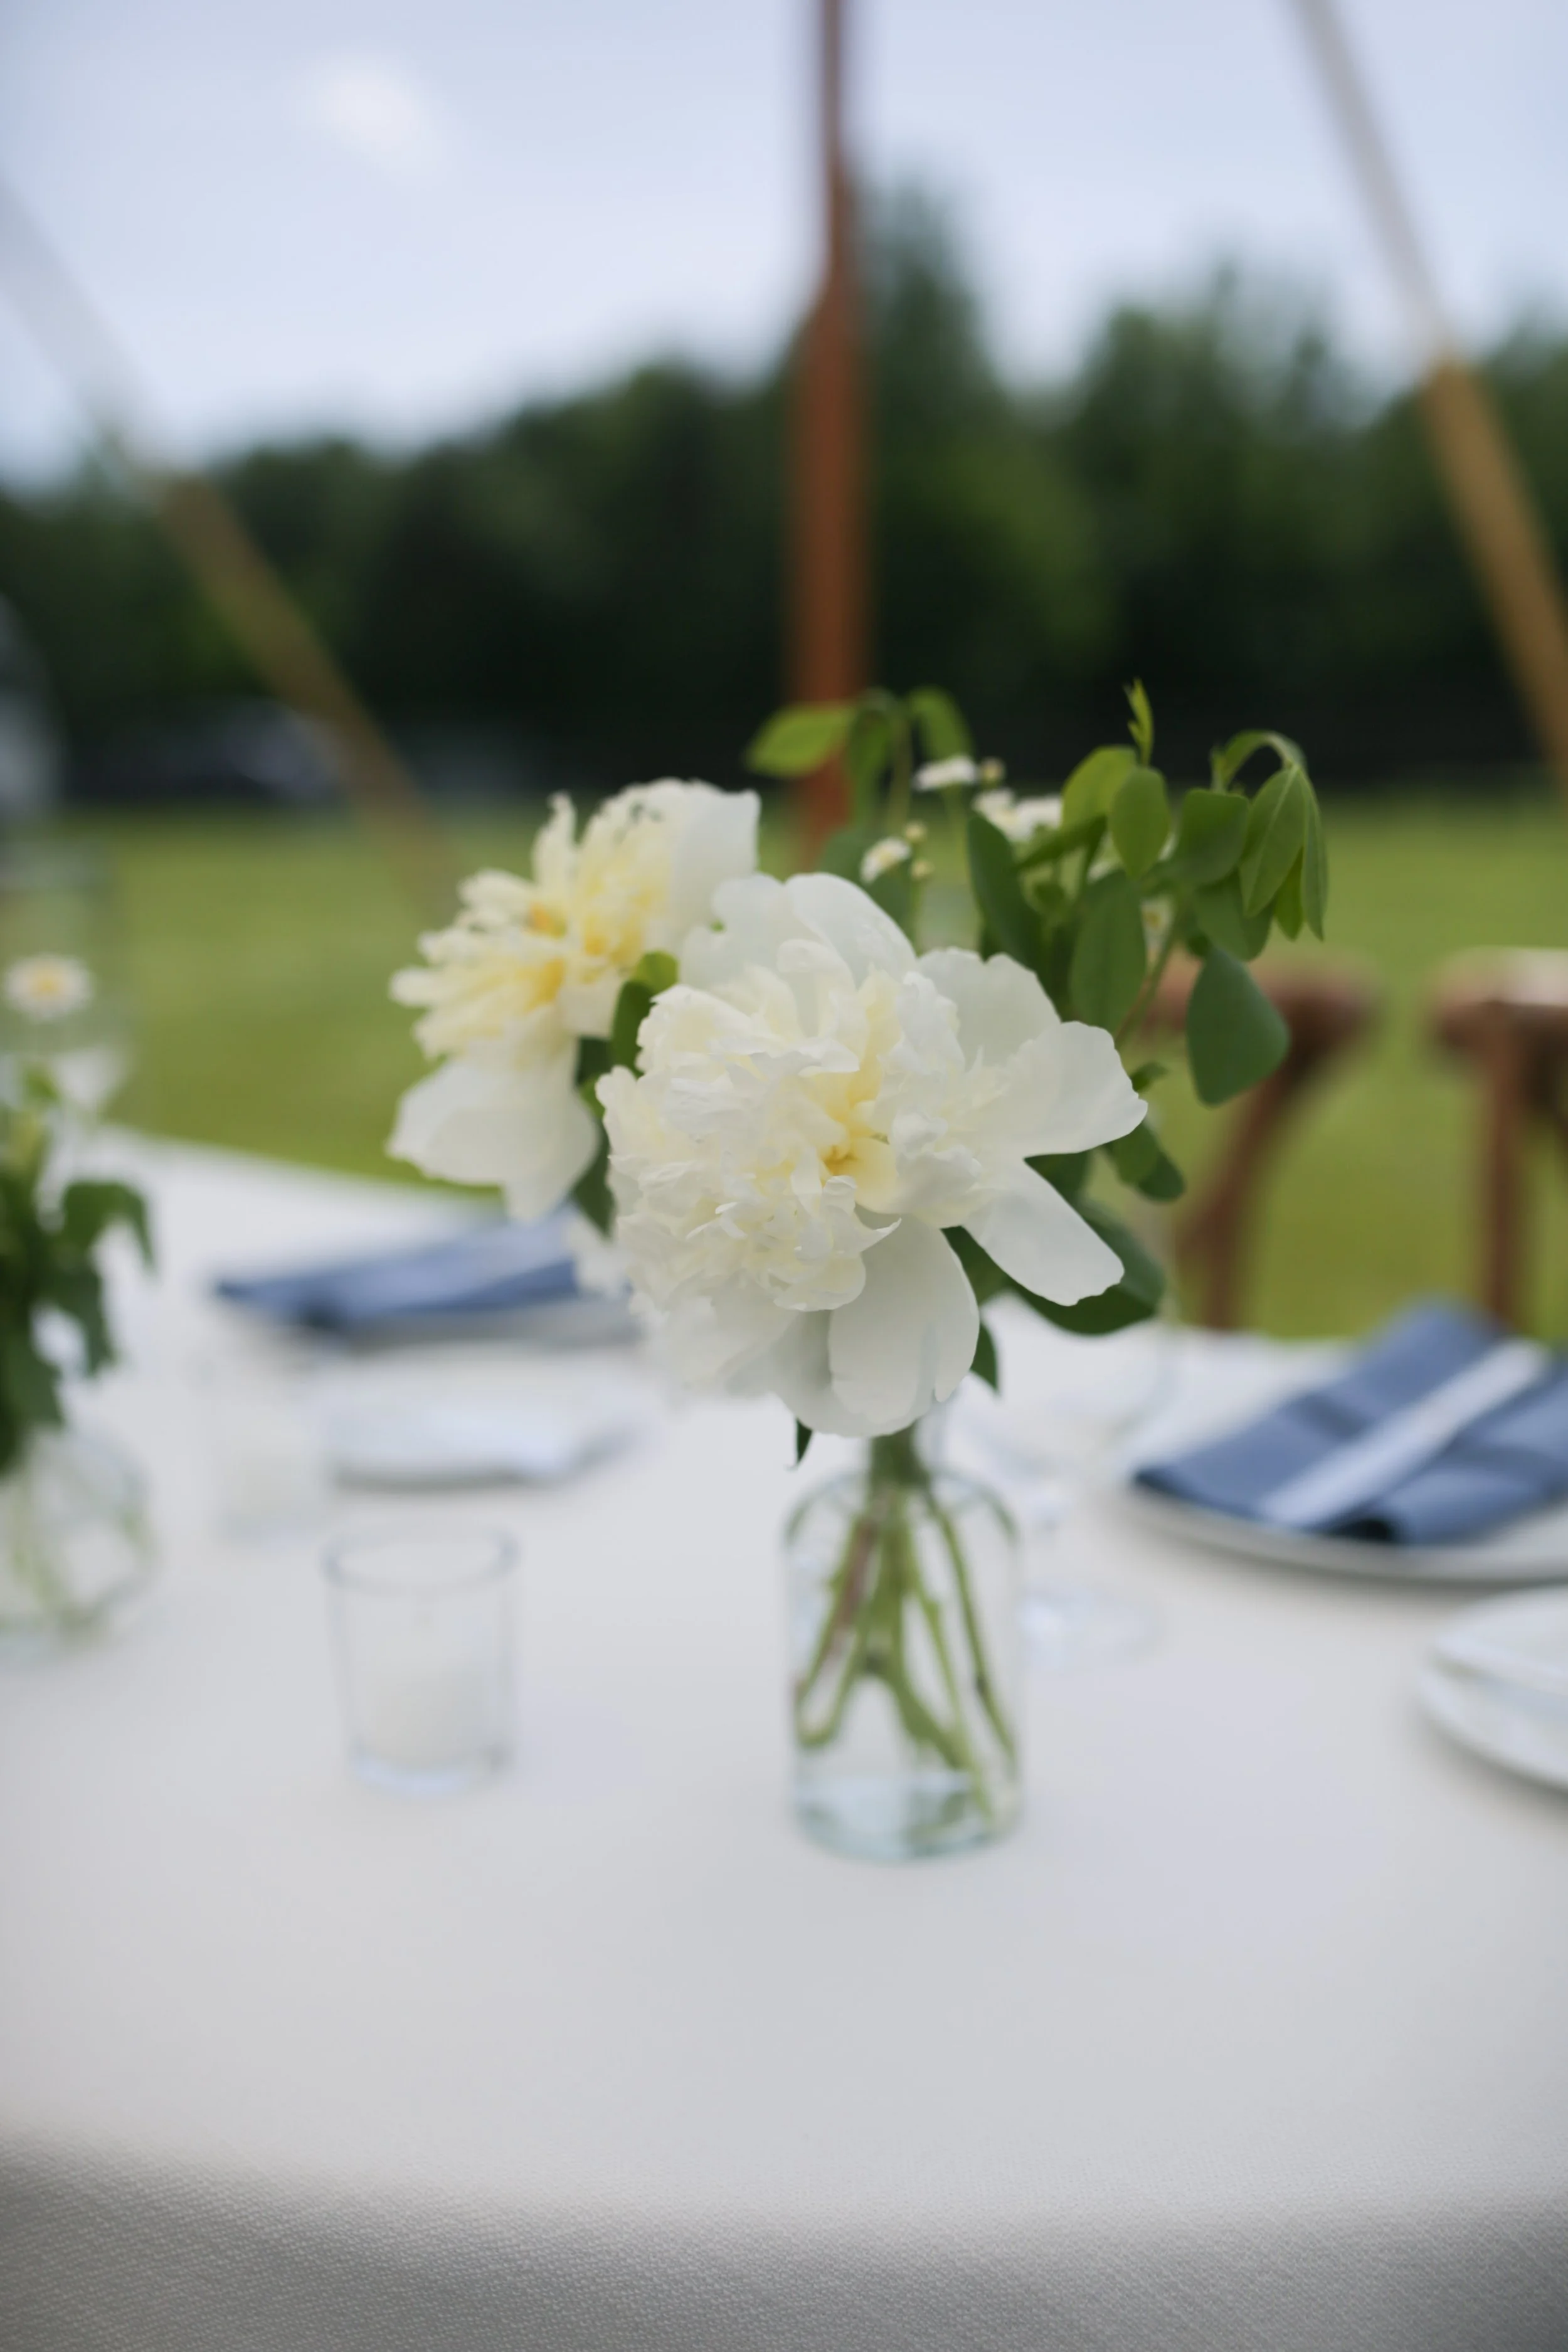
And bud vases were used at the cocktail hour, sweetheart table, cake table, and the bar.

The floral runners, round 2: they framed the stage perfectly! (photo cred: Jen Fariello)

July Flower of the Month: Lisianthus
Flower of the Month (July)
Eustoma, commonly known as Lisianthus.
The flower that looks like a rose but isn’t a rose and requires a lot less effort to grow.
As someone who adores roses but just doesn’t have the time or patience (or an 8 foot stone wall to keep animals away) to grow them at scale, lisianthus is what allows me to have a fluffy rose like ingredient in design work without having to fret over them.
Deer and rodents avoid them, pests don’t seem to notice they’re around, and they aren’t phased at all by heat or drought. And as a cut flower, they can last for almost 2 weeks in the vase! A fact that makes one overlook the one downside : lisianthus isn’t a scented flower. Aside from that, they truly are the perfect rose substitute.
Growing lisianthus from seed does take practice, as monitoring temperature in a very precise way is required to get them started. Thankfully can be purchased in plug form if you wish to skip that step (no shame here in admitting that I do!), and planted out in very early spring to get a summer crop.
Harvesting Lisianthus in July may allow for a second flush to come in the fall, but please note that Lisianthus are not cut-and-come again flowers.
Therefore, if you’re going to include them in your flowering borders or landscape, it’s best to dot them in amongst longer blooming plants so their presence won’t be missed.
No matter what, they’re well worth growing and will make your indoor and outdoor spaces lovely.
What to plant in June
When June rolls around, it can feel a little bit like you’ve missed the glorious spring window to plant.
And yes, you may have missed the perfect window to plant trees, shrubs, and perennials (have no fear, the perfect fall window of planting is arriving for that soon), but you haven’t missed the opportunity to grow some beautiful flowers that have the two important qualities necessary for planting in June: they grow quickly and, once established, aren’t too bothered by heat and drought.
Below is the list of flowers you can start from seed or tuber now (if you’re reading this in early June), either in a seed tray/pot or directly into a prepared garden bed, and enjoy a harvest of flowers from August to the first frost.

Sunflowers
Let’s start with a caveat: the sunflowers that fit into the cut-and-come again category are the branching varieties. The single stem varieties that you tend to see in the large farm fields are one-and-done bloomers that are still fun to grow, but won’t give you as much full season interest as the branching varieties.
Personal favorite branching varieties include: Strawberry Blonde, Chocolate, Italian White, and Rouge Royale.
Planting sunflower seeds is super easy: simply plant about 1 inch deep and keep watered! Or, if you want to watch the magic unfold, these are great seeds for starting in wet paper towels kept in a plastic container and put into a sunny spot indoors before planting out.
Newly emerged sunflowers are favorites of slugs, so sprinkling some Sluggo or other wall natural/pet safe slug repellant around the area you’ve planted them in is a good idea.
Sunflowers are also favorites for furry creatures to nibble on, so netting or a cloche on top of young plants is a good way to keep them safe.

Zinnias
Zinnias come in so many shapes, sizes, and colors that it can be hard to choose which ones to grow. Brightly colored varieties are easily found in most any big box or local store, but the gorgeous pastel and newly bred varieties are best sourced online.
Personal favorites include the Queen Lime series, Zinderella Peach, and Oklahoma White, and the newly released Ballerina zinnia found via Johnny Seeds.
To plant zinnias, simply put the seed about 1” deep.

Cosmos
Word of caution with these beauties: if you don’t like flowers that have a tendency to flop with a rainstorm without tall staking, then these may not be the best choice for your garden. However, if you’re willing to deal with a little bit of floppiness, then there are shorter varieties of cosmos that have a better chance of bouncing back and staying full.
Just as with zinnias, simply plant the seeds one inch deep.
Taller varieties that I grow every year no matter the effort to keep them upright include Afternoon White, Seashells Mix, and Cupcakes Blush.
Shorter variety favorites include Apricot Lemonade and Xanthos.

Hyacinth Bean Vine
One of my forever favorite annual vines is Hyacinth Bean (either the white or purple varieties), for the fact that the vine is so incredibly full and lush, covering a fence/railing/wall in a short amount of time. It also produces beautiful flower shoots that turn into interesting bean pods.
The flower stems are excellent in bud vases, and young pods can be eaten raw. It’s recommended that mature seed pods be cooked thoroughly before consuming.
I like to soak the seeds overnight before planting, and then they’re covered with about an inch or two of soil when put into a seed tray or directly outdoors. Expect to see them emerge and grow very quickly! They’re a fun seed to grow, especially with young children (this plant gives Jack and the Beanstalk vibes).

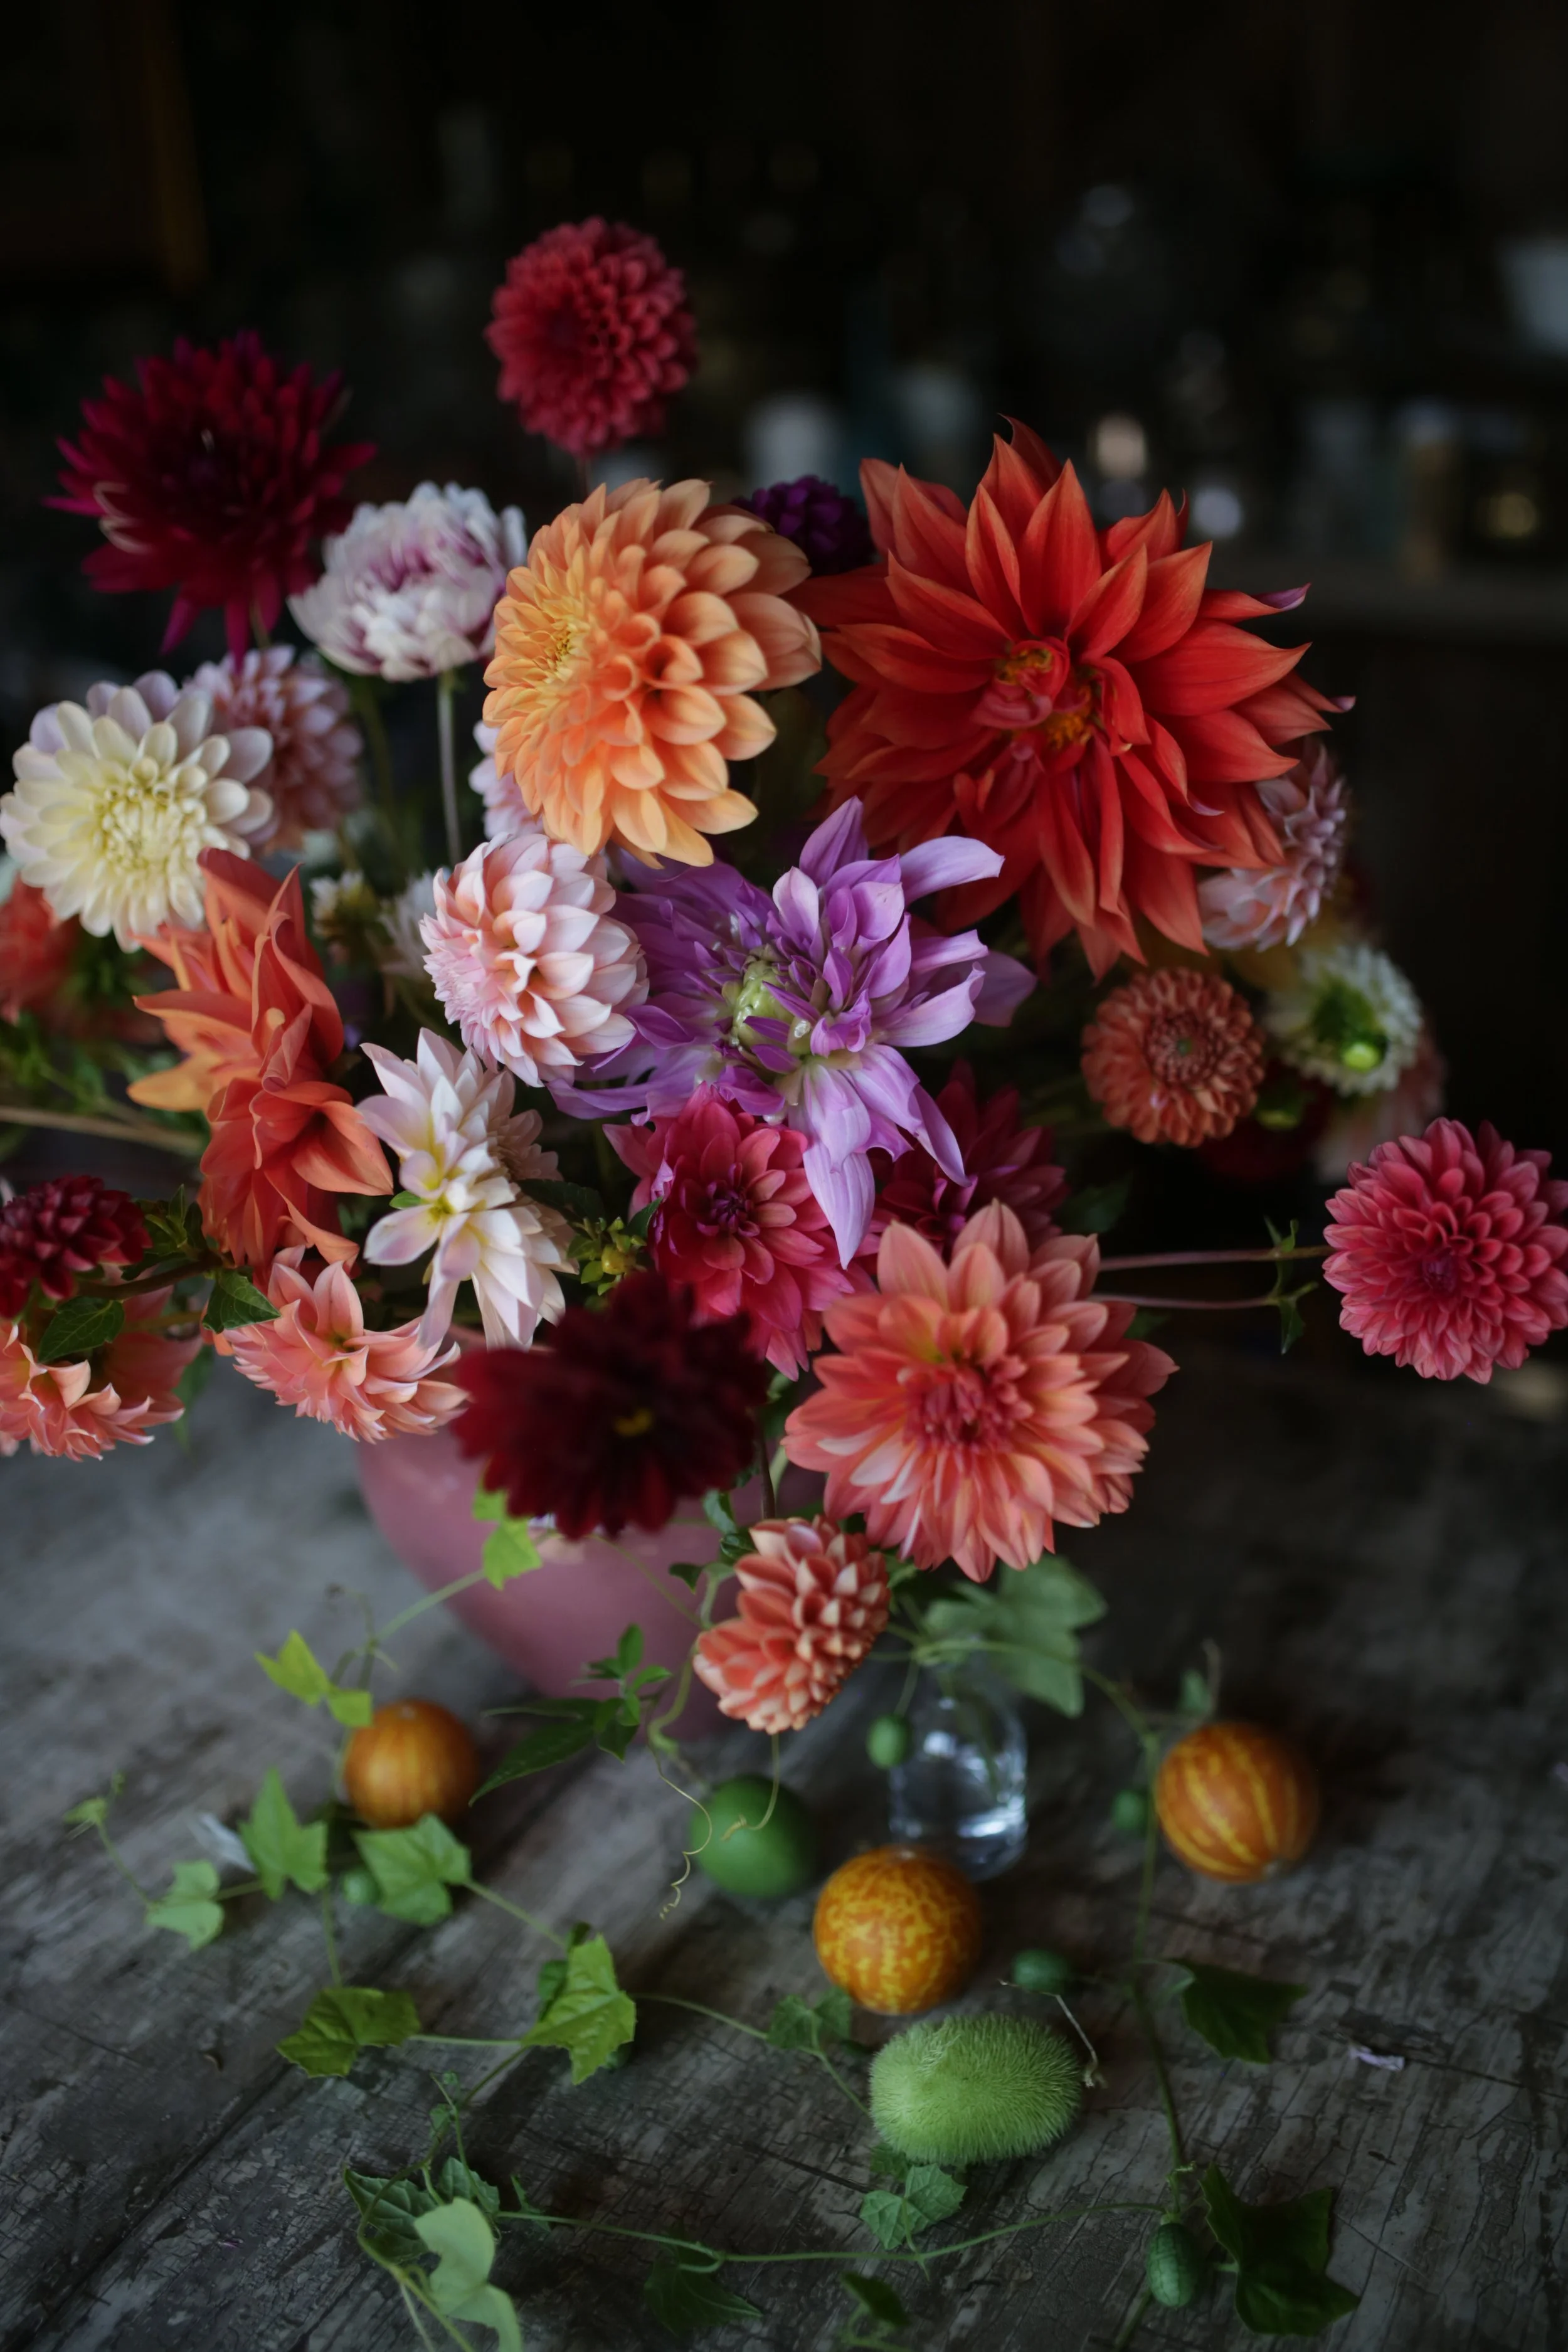
Dahlias
Dahlia plants are typically grown via tubers (unless you want a bit a surprise mix, which can be grown via seeds), and the good news is that if you haven’t already purchased any, you can typically find them highly discounted at this point in the season.
A dahlia tuber produces an eye which then becomes a plant, and planting them is simple: place the tuber on its side as much as possible in a shallow hole. You want the tuber to be covered completely but not have more than an inch or two of soil on top, in order to prevent tuber rot.
It’s a good idea to not water the dahlia tuber until you see the first green shoot appear aboveground. Then, keeping the soil moist but not drenched is a good idea as it begins to reach maturity. After that, dahlias require a deep watering a couple of times a week unless it rains.
Dahlias often require staking, so it’s a good idea to go ahead and put a stake a few inches behind where you planted the tuber at planting time. That way, you won’t risk accidentally pieces the tuber and it’s ready to go when twine is required to hold the plant upright.
Dahlias planted in June should start producing flowers in mid-late August, and they will continue to put out more blooms the more you cut, all the way up to the first frost.
To learn more about dahlias and favorite sources, click here !
-
May 2026
- May 8, 2026 A week in the Garden, 5/2-5/8 May 8, 2026
- May 1, 2026 A week in the Garden, 4/27-5/1 May 1, 2026
-
November 2025
- Nov 14, 2025 Bulb Lasagnas Nov 14, 2025
-
October 2025
- Oct 14, 2025 Hellebores: the perfect shade loving flower of early spring Oct 14, 2025
-
July 2025
- Jul 29, 2025 Real Wedding Inspo, A la Carte Style Jul 29, 2025
- Jul 7, 2025 July Flower of the Month: Lisianthus Jul 7, 2025
-
June 2025
- Jun 2, 2025 What to plant in June Jun 2, 2025
- Jun 2, 2025 June Jobs for the Garden Jun 2, 2025
-
May 2025
- May 5, 2025 Moody Flowering Planter Recipe May 5, 2025
- May 5, 2025 May Flower Focus: Peonies May 5, 2025
-
April 2025
- Apr 6, 2025 April Flower Focus: Ranunculus Apr 6, 2025
- Apr 6, 2025 Planting dahlia tubers indoors Apr 6, 2025
-
March 2025
- Mar 2, 2025 March Flower Focus: Anemones Mar 2, 2025
-
February 2025
- Feb 27, 2025 Favorite Flowering Shrubs Feb 27, 2025
-
January 2025
- Jan 28, 2025 My Five Favorite Dahlia Forms (and how to incorporate them into your garden) Jan 28, 2025
-
December 2024
- Dec 11, 2024 Naturalistic Holiday Tablescapes Dec 11, 2024
- Dec 11, 2024 Planting a Bulb Lasagna Dec 11, 2024
-
September 2024
- Sep 29, 2024 The mistake that led to total garden failure - and how I fixed it. Sep 29, 2024
-
August 2024
- Aug 5, 2024 foraged greenery for August flower arrangements Aug 5, 2024
-
June 2024
- Jun 24, 2024 Four flower seeds to sow in June to enjoy a late summer harvest Jun 24, 2024
-
April 2024
- Apr 23, 2024 Four mosquito repellent plants to add to your patio Apr 23, 2024
-
March 2024
- Mar 25, 2024 My Garden Tool Must Haves Mar 25, 2024
- Mar 9, 2024 The best dry-able flowers for Virginia gardens Mar 9, 2024
-
February 2024
- Feb 29, 2024 The best flowering vines for Virginia gardens Feb 29, 2024
- Feb 27, 2024 For Virginia flower growers: Sourcing Perennials Feb 27, 2024
- Feb 9, 2024 Where to find incredible flower seeds Feb 9, 2024
-
January 2024
- Jan 31, 2024 Hardy Annuals Jan 31, 2024
-
December 2023
- Dec 13, 2023 Holiday Gift Ideas for Flower Lovers and Growers Dec 13, 2023
-
March 2023
- Mar 3, 2023 Flower Garden Documentaries to Inspire Mar 3, 2023
-
January 2023
- Jan 20, 2023 Valentine's Day Jan 20, 2023
-
January 2022
- Jan 12, 2022 Thoughts on Weddings Jan 12, 2022
- Jan 10, 2022 2021 Recap Jan 10, 2022
-
November 2021
- Nov 2, 2021 Growing Ranunculus Nov 2, 2021
-
March 2020
- Mar 17, 2020 Early Spring Planting In Virginia Mar 17, 2020
-
December 2019
- Dec 6, 2019 The Beginning Dec 6, 2019